2D Sketch
New Sketch
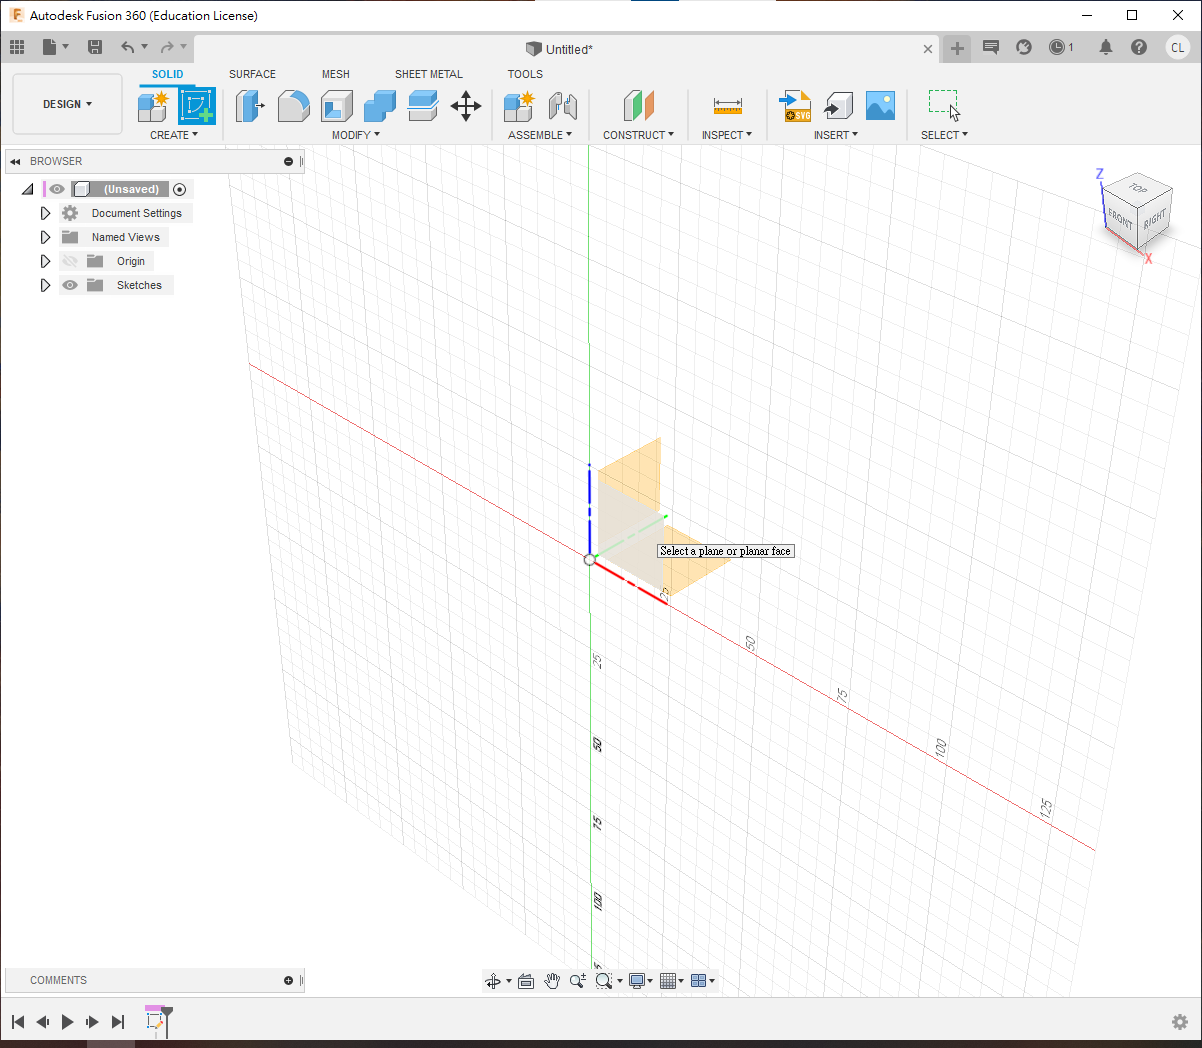
- Click New Sketch in the toolbar, or press
Sand search forNew Sketch. - Select the face on which you want to create the 2D sketch. This exercise focuses on different 2D constraints, so the face you choose does not matter.
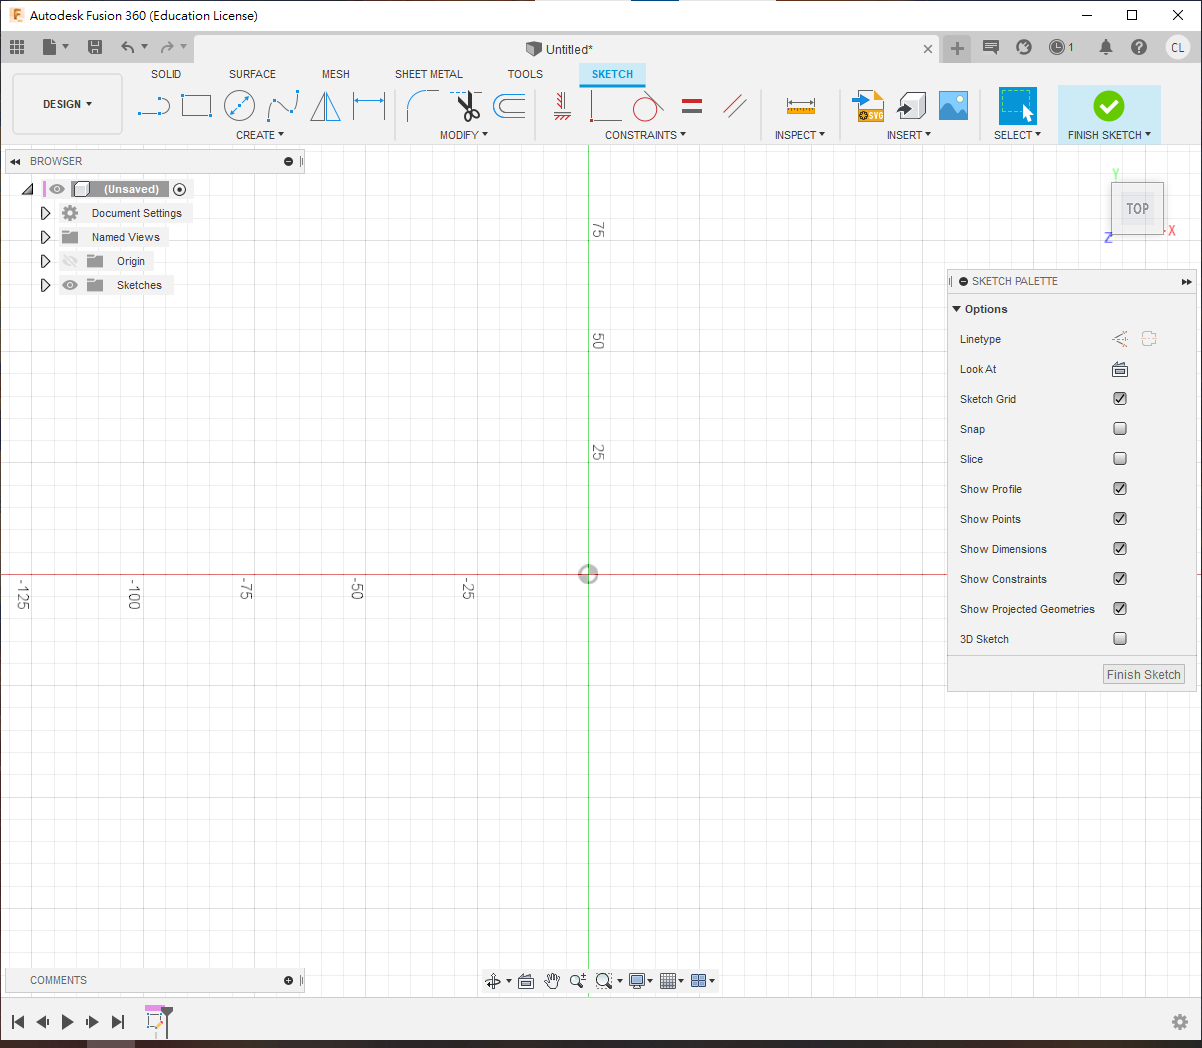
- The interface will then change slightly to the dedicated 2D-sketch workspace.
- We will go through the toolbar from left to right.
Create Tools
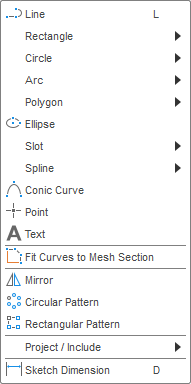
- The first group is the Create toolbar. It contains the most commonly used 2D drawing tools and is similar to AutoCAD or Rhino.
- These include Line, Rectangle, Circle, Arc, Polygon, Ellipse, Point and Text.
- Other specialised tools include Slot, Spline and Conic Curve.
- Tools for quickly creating repeated geometry include Mirror, Circular Pattern and Rectangular Pattern.
⚠️WARNING
Use these three repetition tools with care. Fusion 360 does not handle very large 2D sketches well and may freeze. Whenever possible, first turn the sketch into 3D geometry and then use the 3D Mirror and Pattern tools.
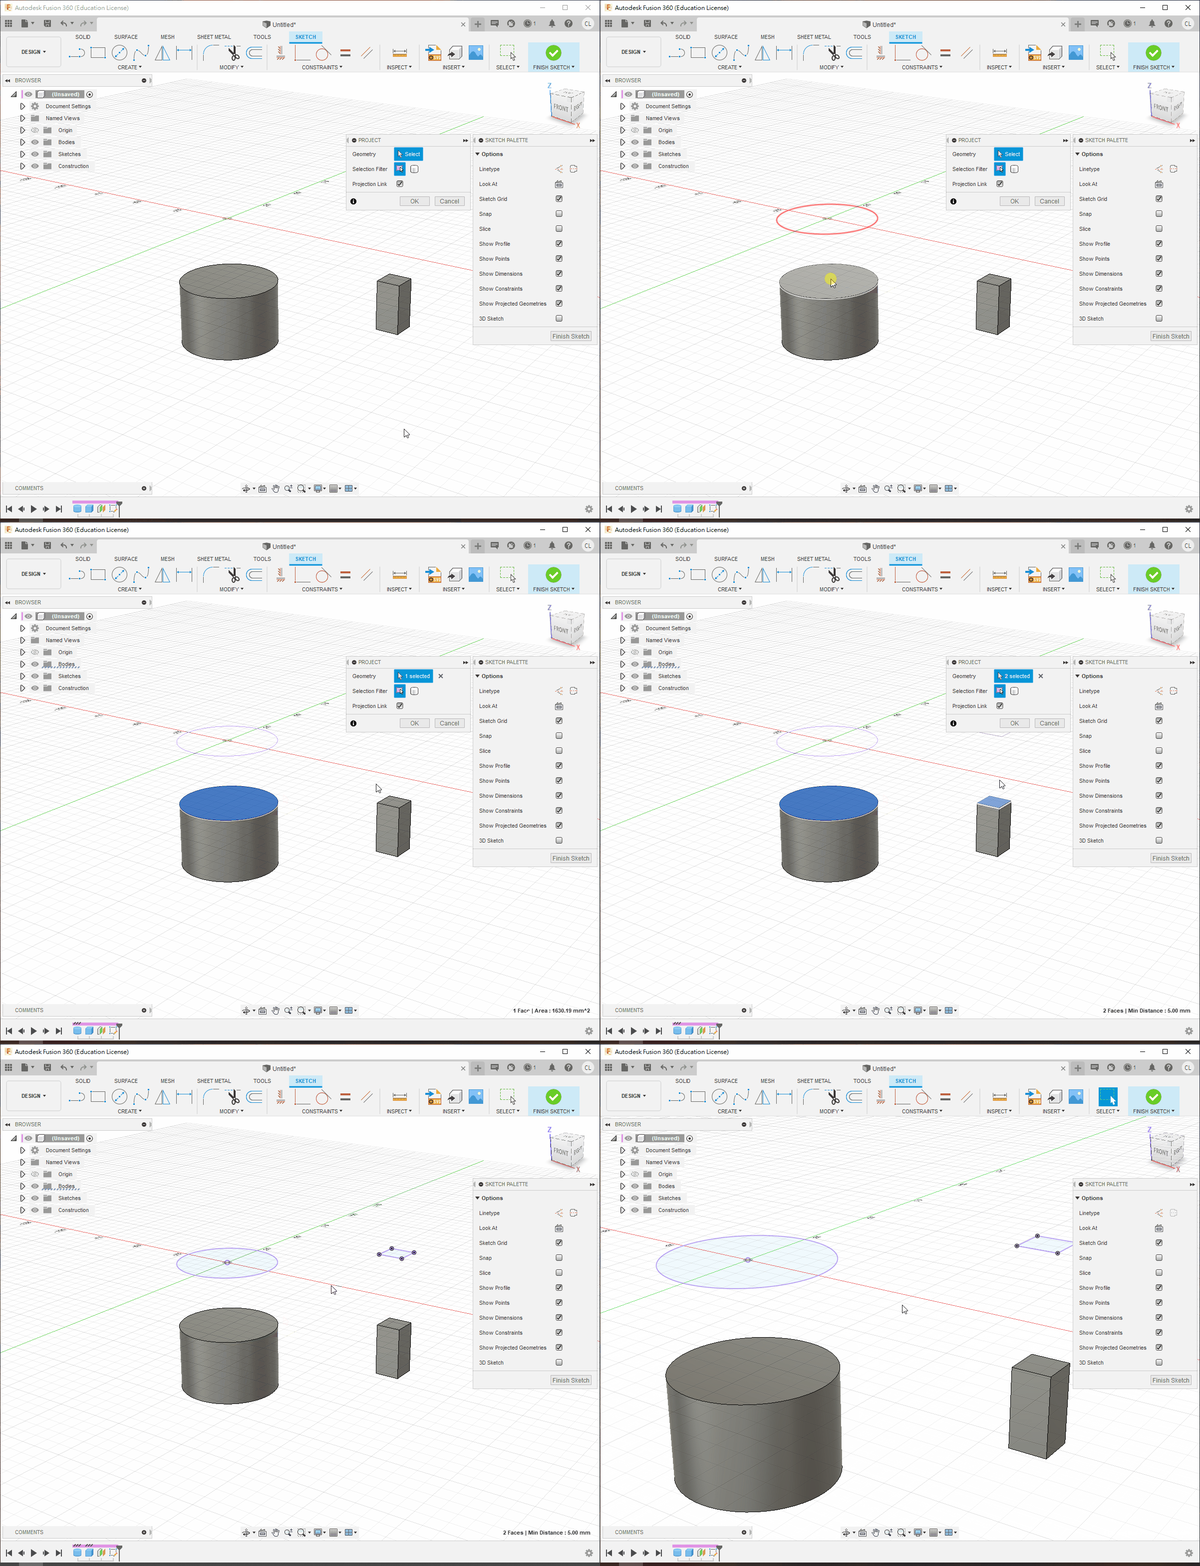
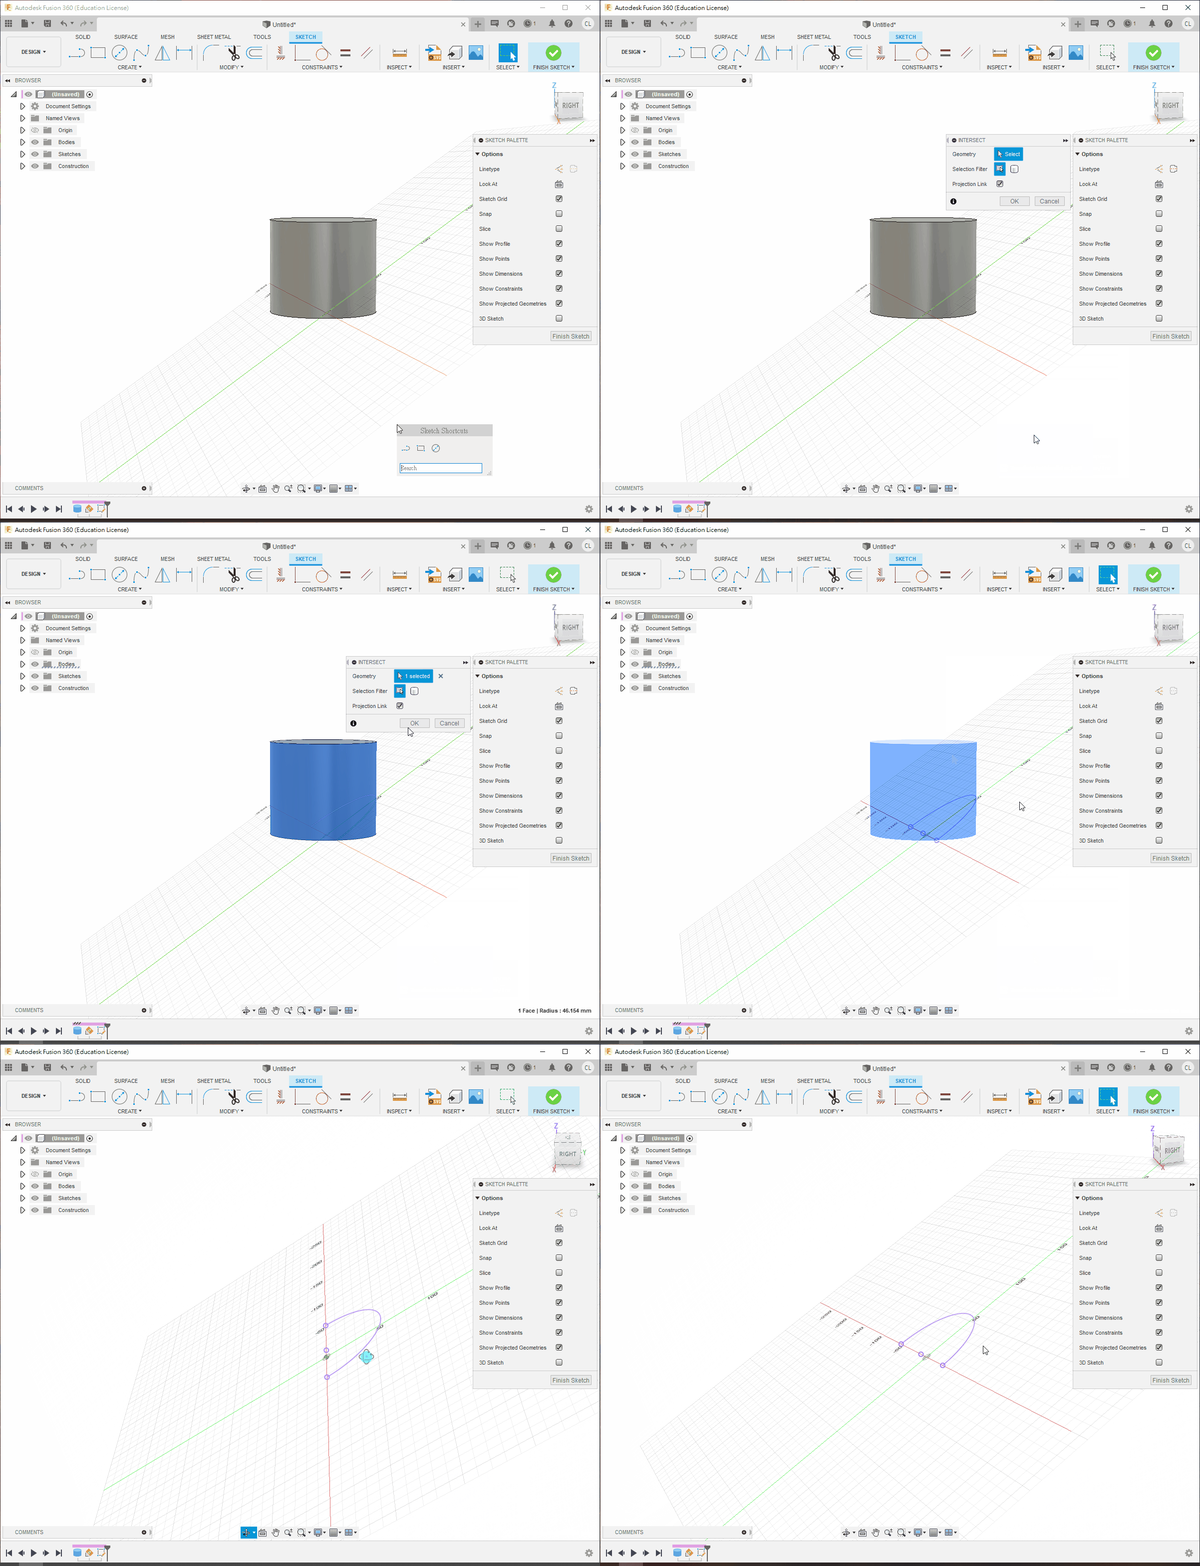
Project / Include: projects geometry that is not part of the current sketch into it.Intersectcreates sketch geometry where the sketch plane intersects a 3D body.
Modify Tools
⚠️WARNING
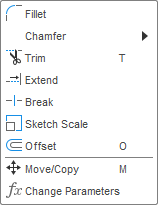
- Do not use 2D modification tools such as Fillet, Chamfer, Trim, Scale or Move/Copy unless necessary.
- Feature-based software such as Fusion 360 is not well suited to extensive editing inside a 2D sketch and may freeze easily.
- These 2D edits do not create separate timeline features, which makes later changes much more difficult.
- Editing the geometry may also remove its original 2D constraint relationships.
Offset: offsets the selected geometry. This is a very commonly used tool.
ℹ️INFO
Geometry created with Offset cannot itself be offset again. Select the original geometry if you need another offset.
Change Parameters: defines variables so that related values can be changed easily.- All matching values can be updated at once.
- For example, if a screw-hole diameter is defined as
3 mm, changing the parameter once to2 mmimmediately updates every corresponding hole.
Sketch Colours
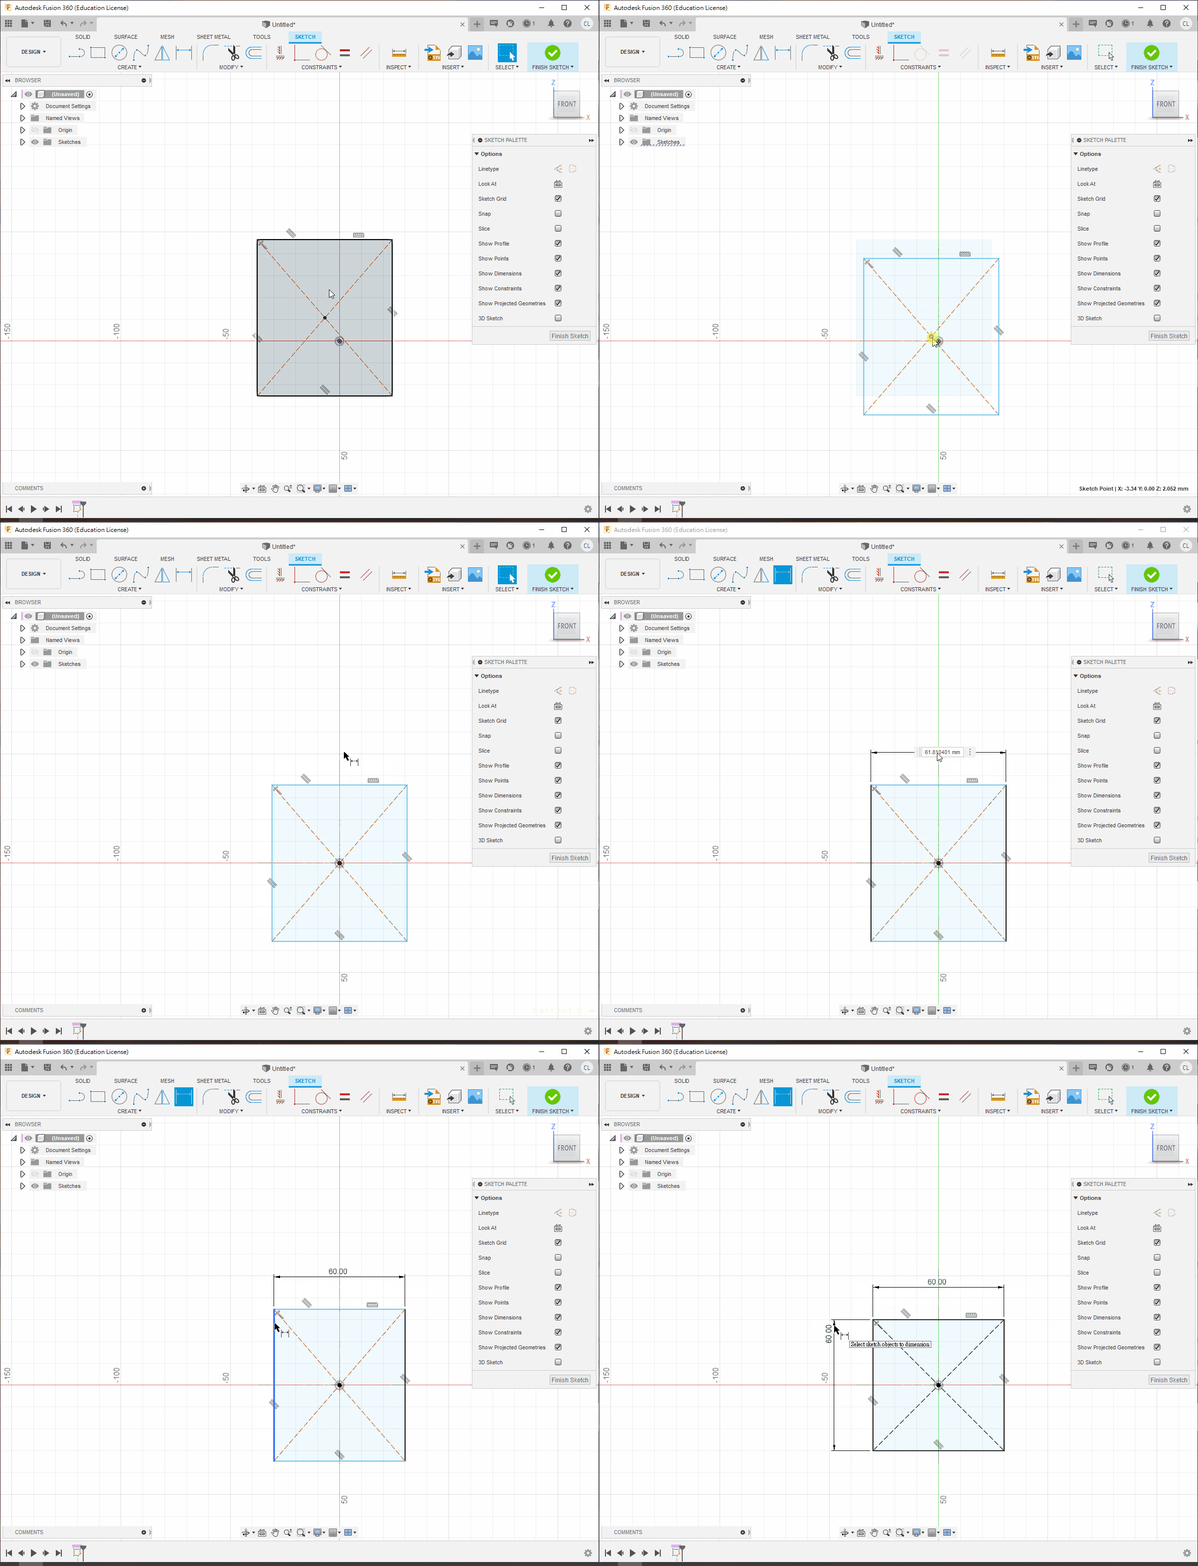
While drawing a 2D sketch, you will see different colours. They indicate different properties:
- Blue: the line or shape is not fully constrained and can still be dragged freely.
- Black: the line or shape is fully constrained.
ℹ️INFO
Try to keep all lines in a 2D sketch black. Fully constrained sketches are less likely to produce errors when parameters change.
- Orange dashed: construction geometry that is not fully constrained.
ℹ️INFO
Press the X shortcut to quickly switch selected geometry between normal and construction geometry.
- Black dashed: fully constrained construction geometry.
- Purple solid/dashed: projected geometry.
- Green solid/dashed: fixed geometry. Avoid using fixed geometry whenever possible.
Important Notes
ℹ️INFO
Take care when using Mirror and Pattern. Fusion 360 does not handle very large 2D sketches well and may freeze. Whenever possible, convert the sketch into 3D geometry first, then use the 3D Mirror and Pattern tools.
ℹ️INFO
Every Fusion 360 sketch is feature-based, so Copy and Paste is rarely needed. If you really need to copy geometry, create another sketch and project the previous sketch into the new one.
⚠️WARNING
Do not use 2D modification tools such as Fillet, Chamfer, Trim, Scale or Move/Copy unless necessary.
Translation notice: This English page was generated automatically by AI and has not yet been reviewed by a human. It will be checked and revised page by page when time permits.