Getting Started with ESP32
ESP32 DevKit 32E
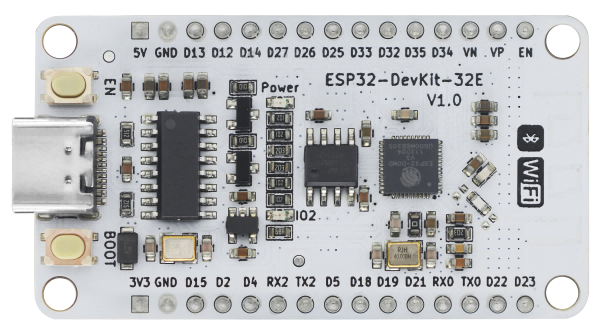
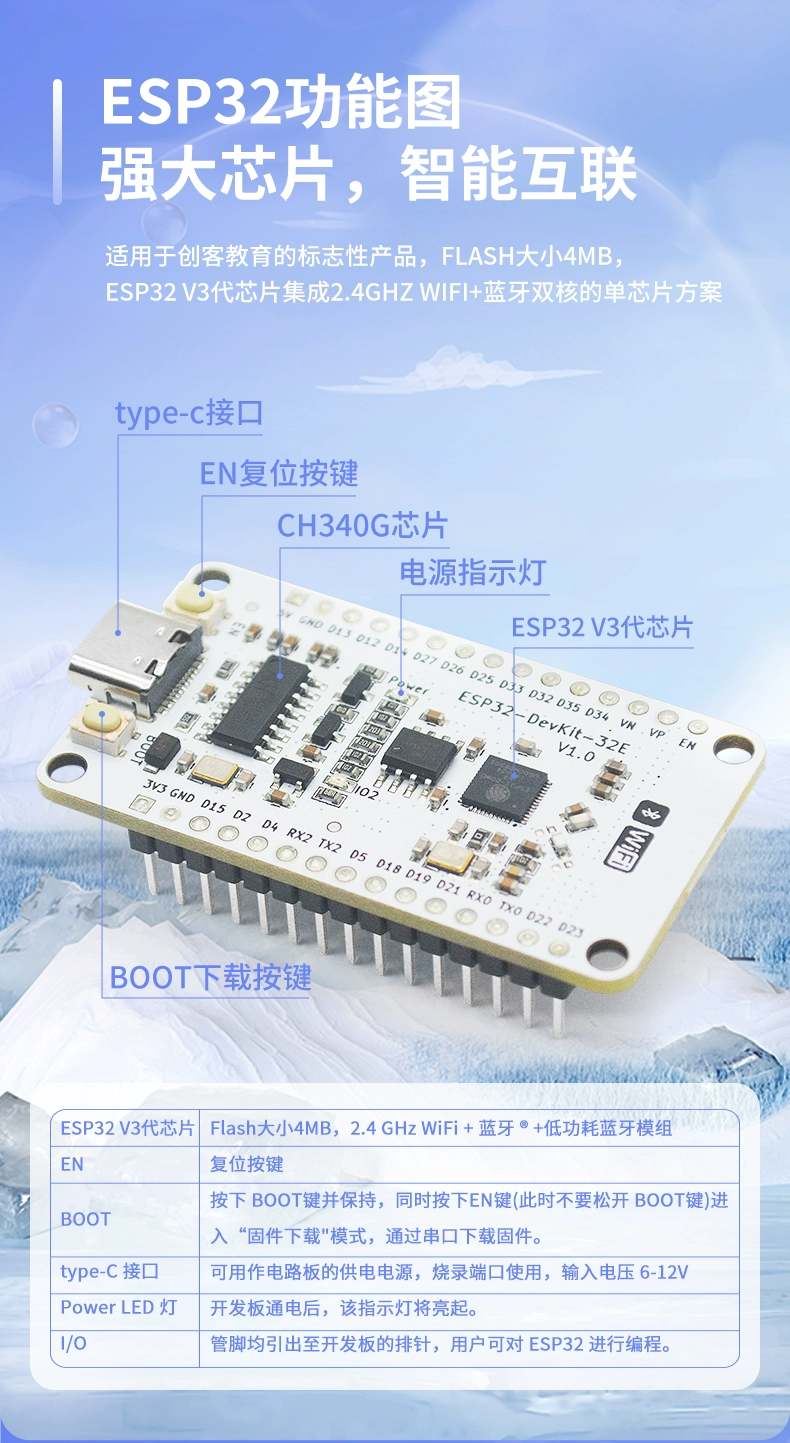
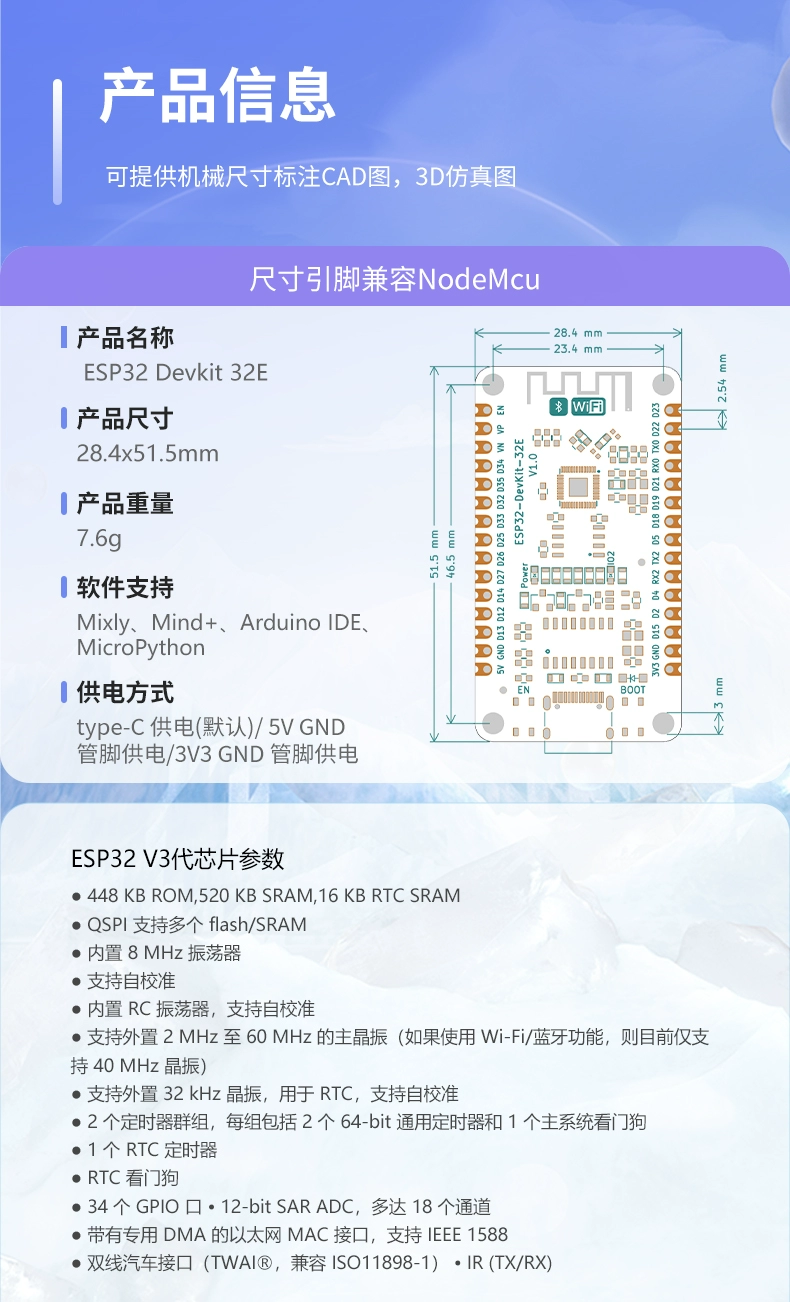
| Feature | Arduino (typical AVR / Arduino boards) | ESP32 family |
|---|---|---|
| Type | Microcontroller development board, such as an Uno based on the ATmega328P | SoC (system on a chip) integrating an MCU, Wi-Fi and Bluetooth |
| Core / architecture | Usually 8-bit AVR, such as the ATmega328P; some models use 32-bit ARM | Usually 32-bit Xtensa LX6/LX7, with newer models using RISC-V |
| Operating voltage | Usually 5 V | Usually 3.3 V; 5 V compatibility requires care |
| RAM / flash | Relatively small; an Uno has 2 KB SRAM and 32 KB flash | Considerably more; a typical ESP32 has 520 KB SRAM |
| Wireless communication | Wi-Fi and Bluetooth require add-on modules | Wi-Fi and Bluetooth are built in |
| Processing power | Relatively low, typically around 16 MHz | Higher, typically 160–240 MHz, with dual-core support on some models |
For teaching basic control concepts to beginners, Arduino is often the better choice.
- It has a gentle learning curve, plentiful examples, and a straightforward hardware–software workflow.
- Many classroom courses and textbooks use Arduino as their introductory platform.
- It is more than adequate for basic control, digital and analogue I/O, LEDs, buttons and simple sensors.
If a project needs networking, cloud services, remote control or low-power operation, consider ESP32 first.
- ESP32 is a natural fit for IoT, remote data uploads and wireless sensor networks.
- Built-in Wi-Fi and Bluetooth reduce the need for additional modules.
- Where resources permit, students can move directly into practical IoT applications.
Use a progressive teaching sequence.
Start with Arduino, then advance to ESP32. Students can learn fundamental digital and analogue control before adding wireless networking and data communication, avoiding too many new technical details at once.
Check hardware compatibility.
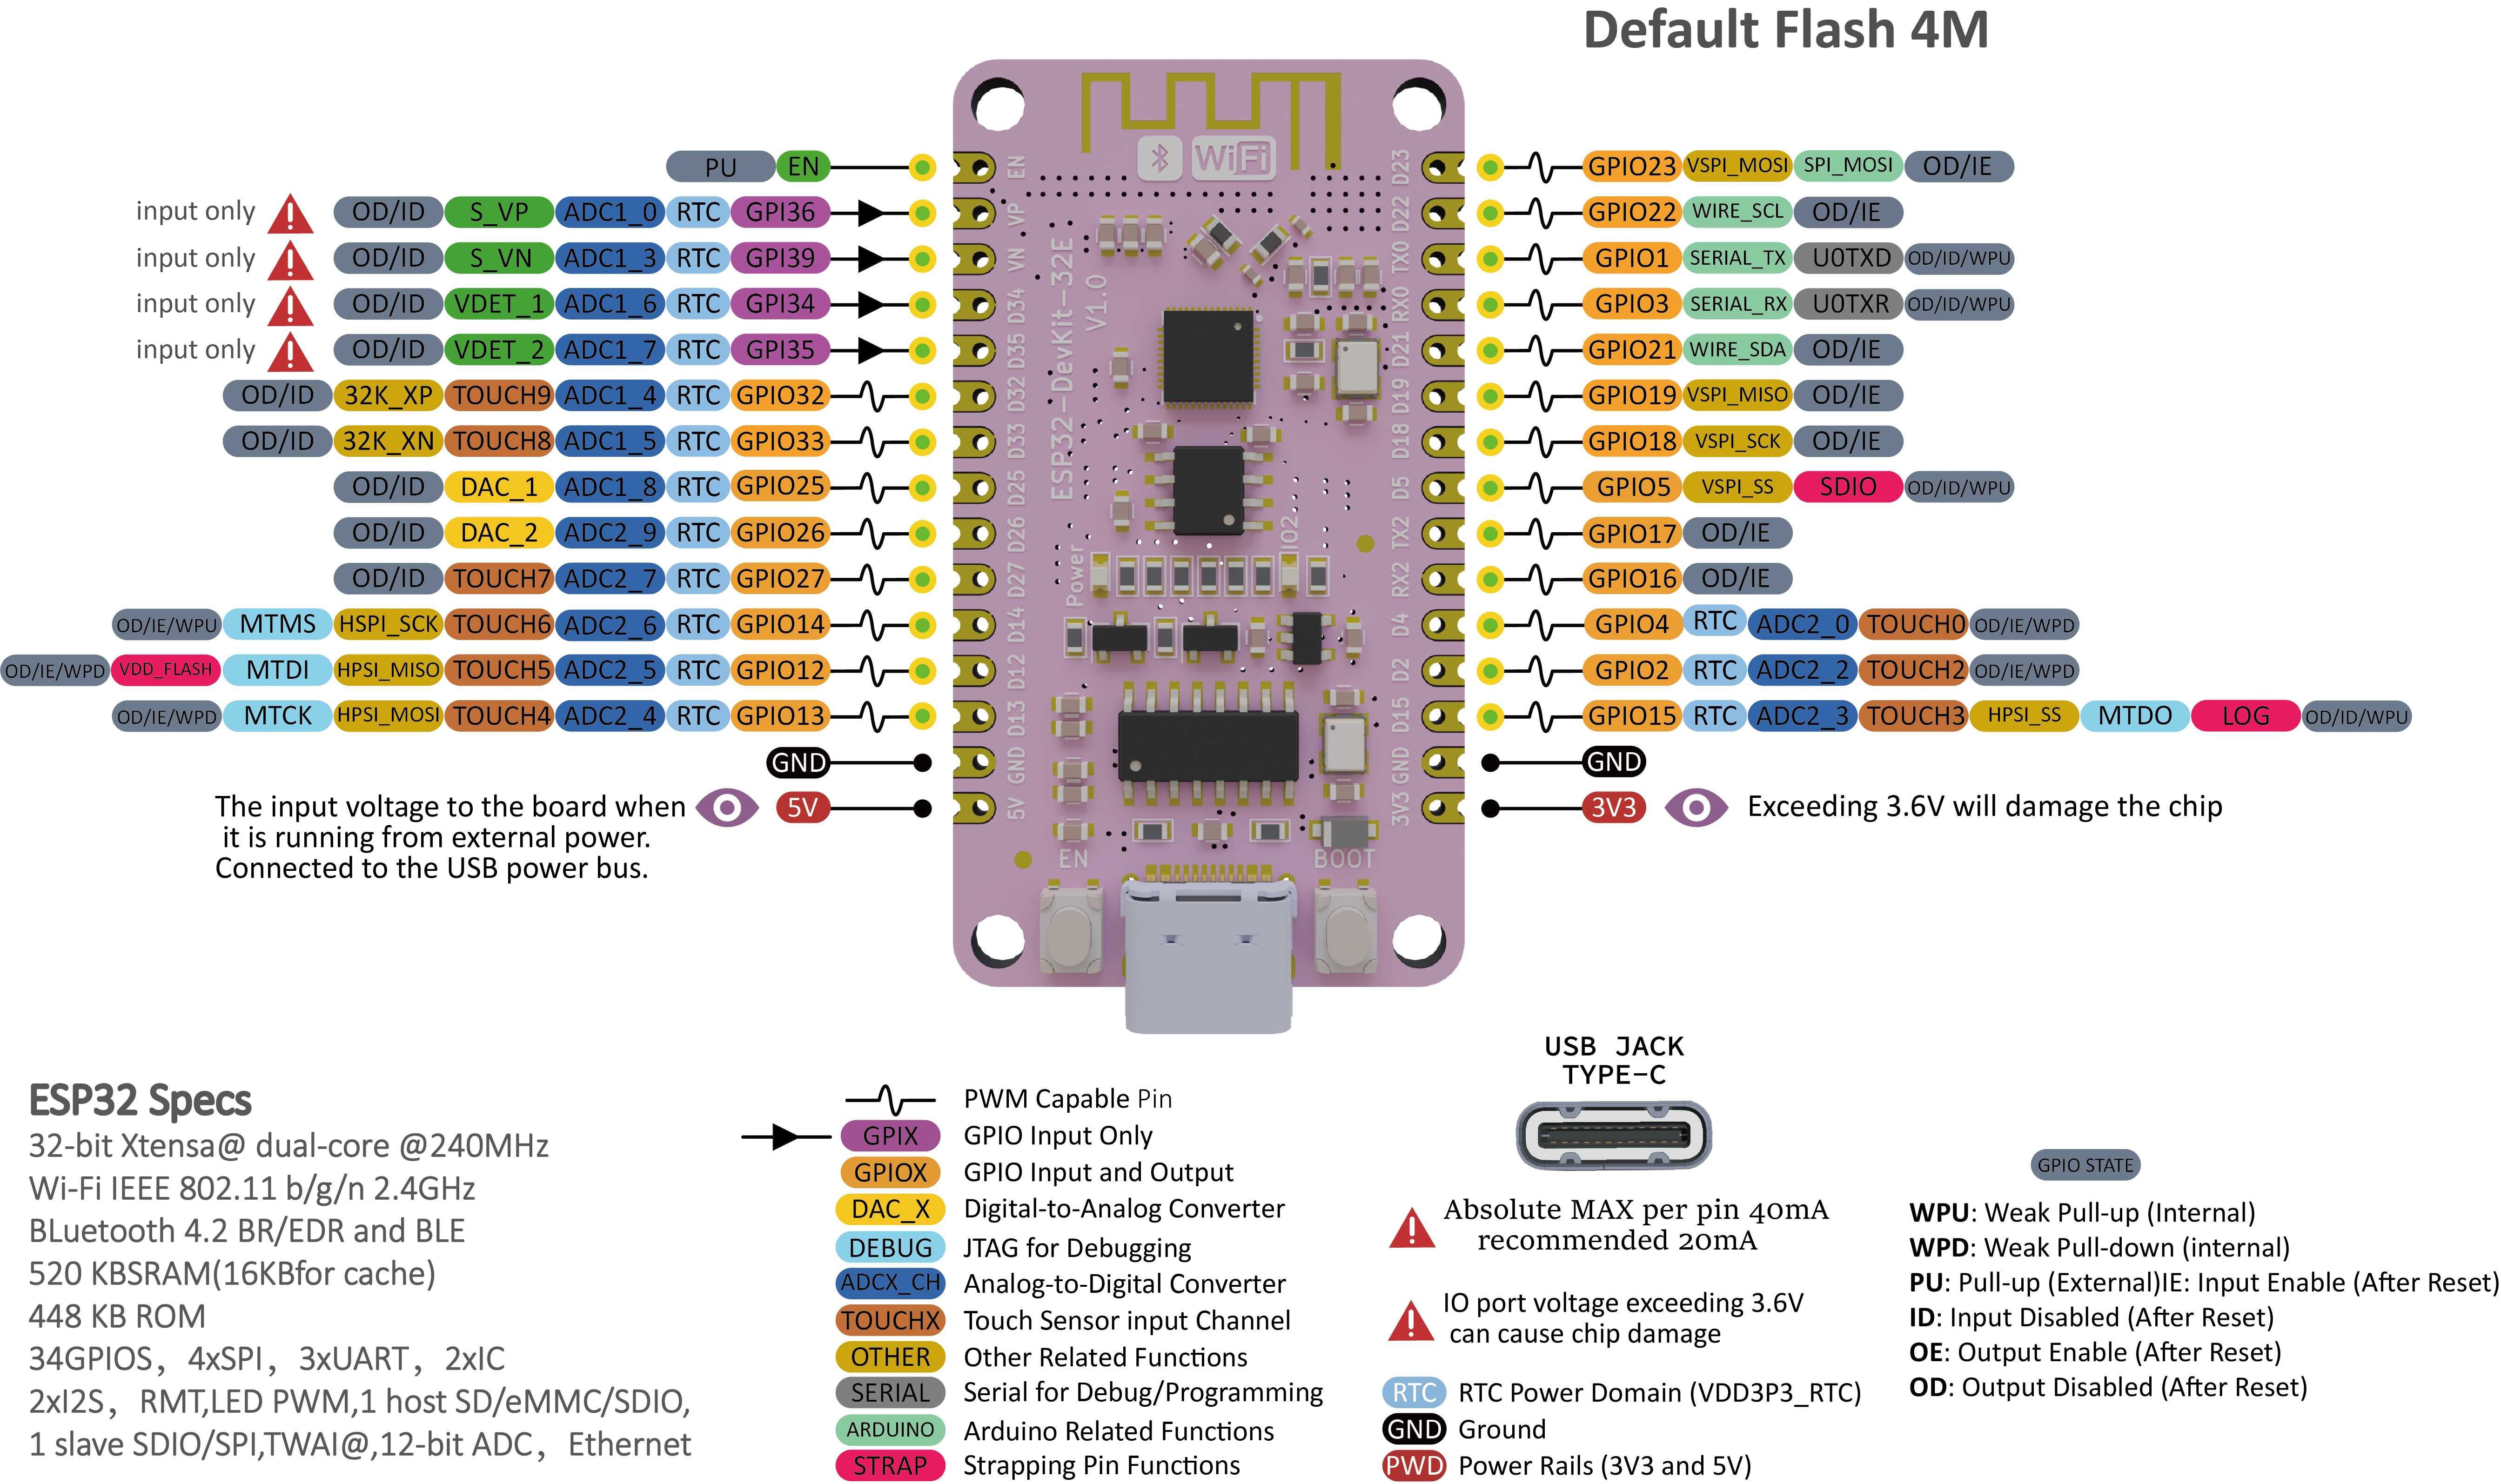
- Some ESP32 pins have restrictions or special functions during startup and cannot always be treated as ordinary GPIO pins.
- Check voltage compatibility before connecting 5 V sensors or modules.
- Older teaching materials and shields designed for Arduino may use an incompatible pinout.
Pinout
Upload Test
- Open Arduino IDE 2.0 or later.
- This setup is only required once:
- Select Boards in the left sidebar.
- Search for
ESP32. - Install
ESP32 by Espressif.
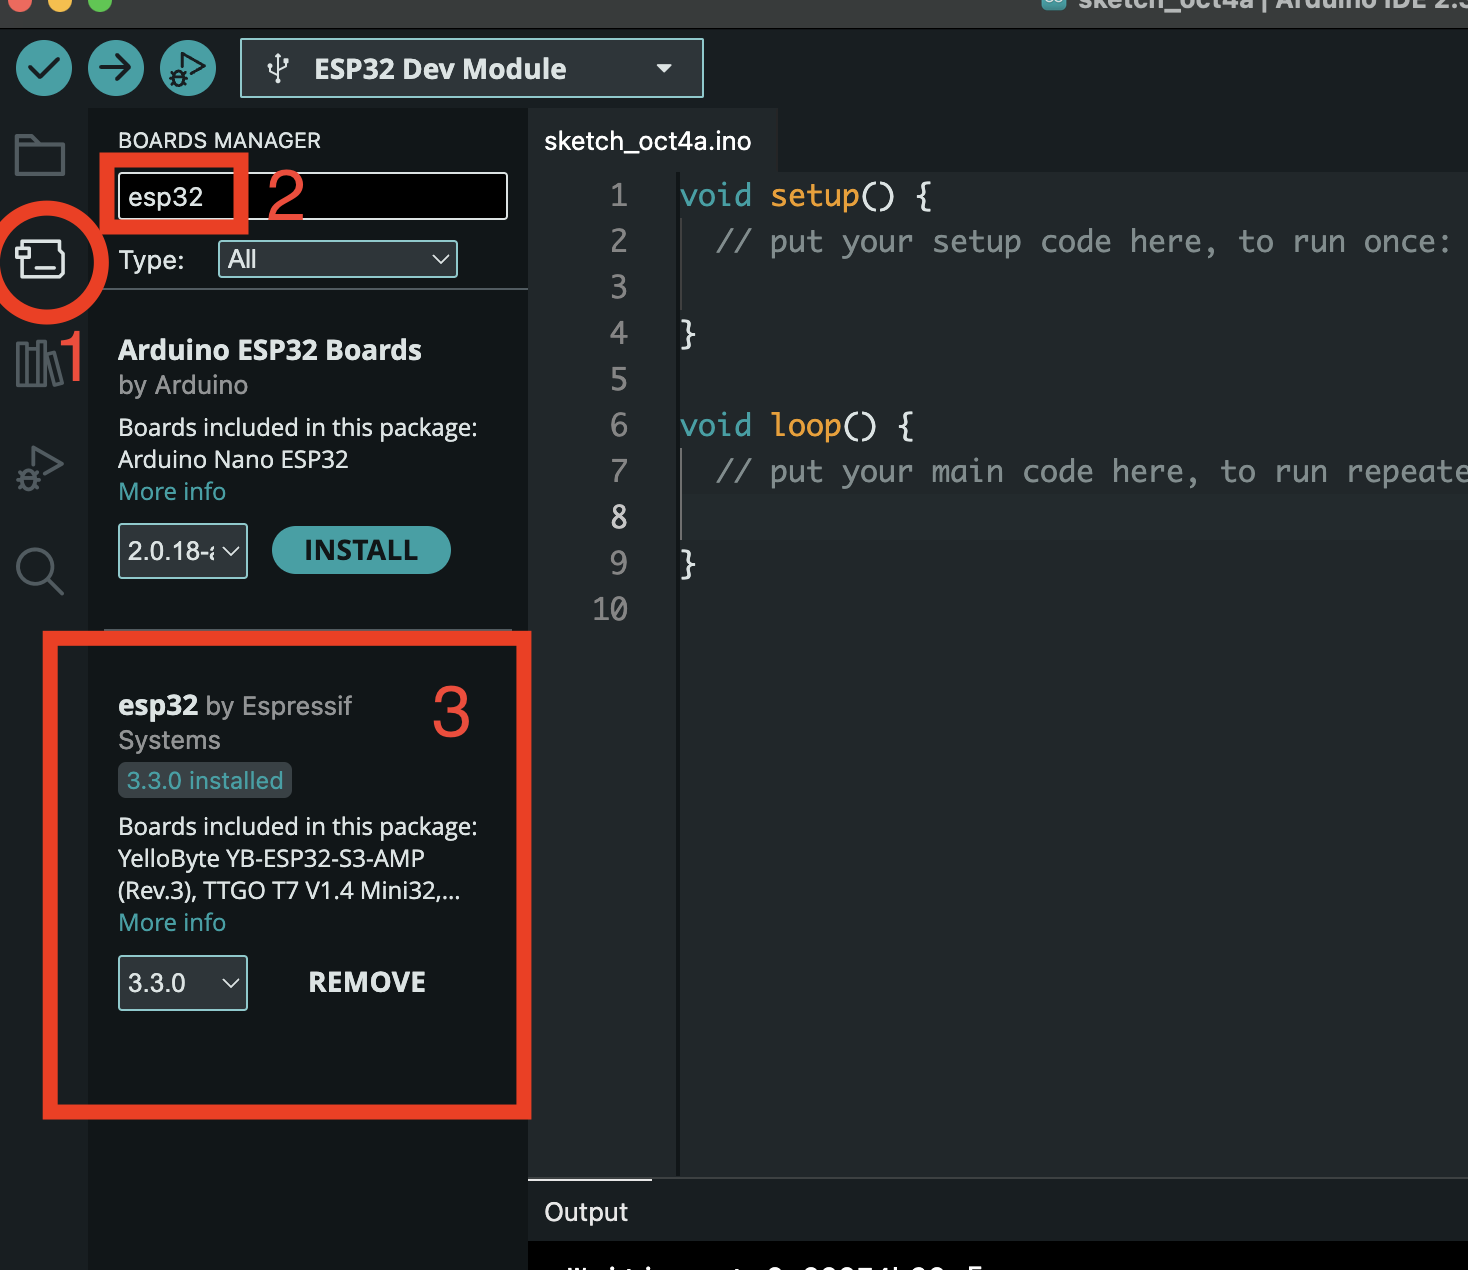
Select
Tools → Board → esp32 → ESP32 Dev Module.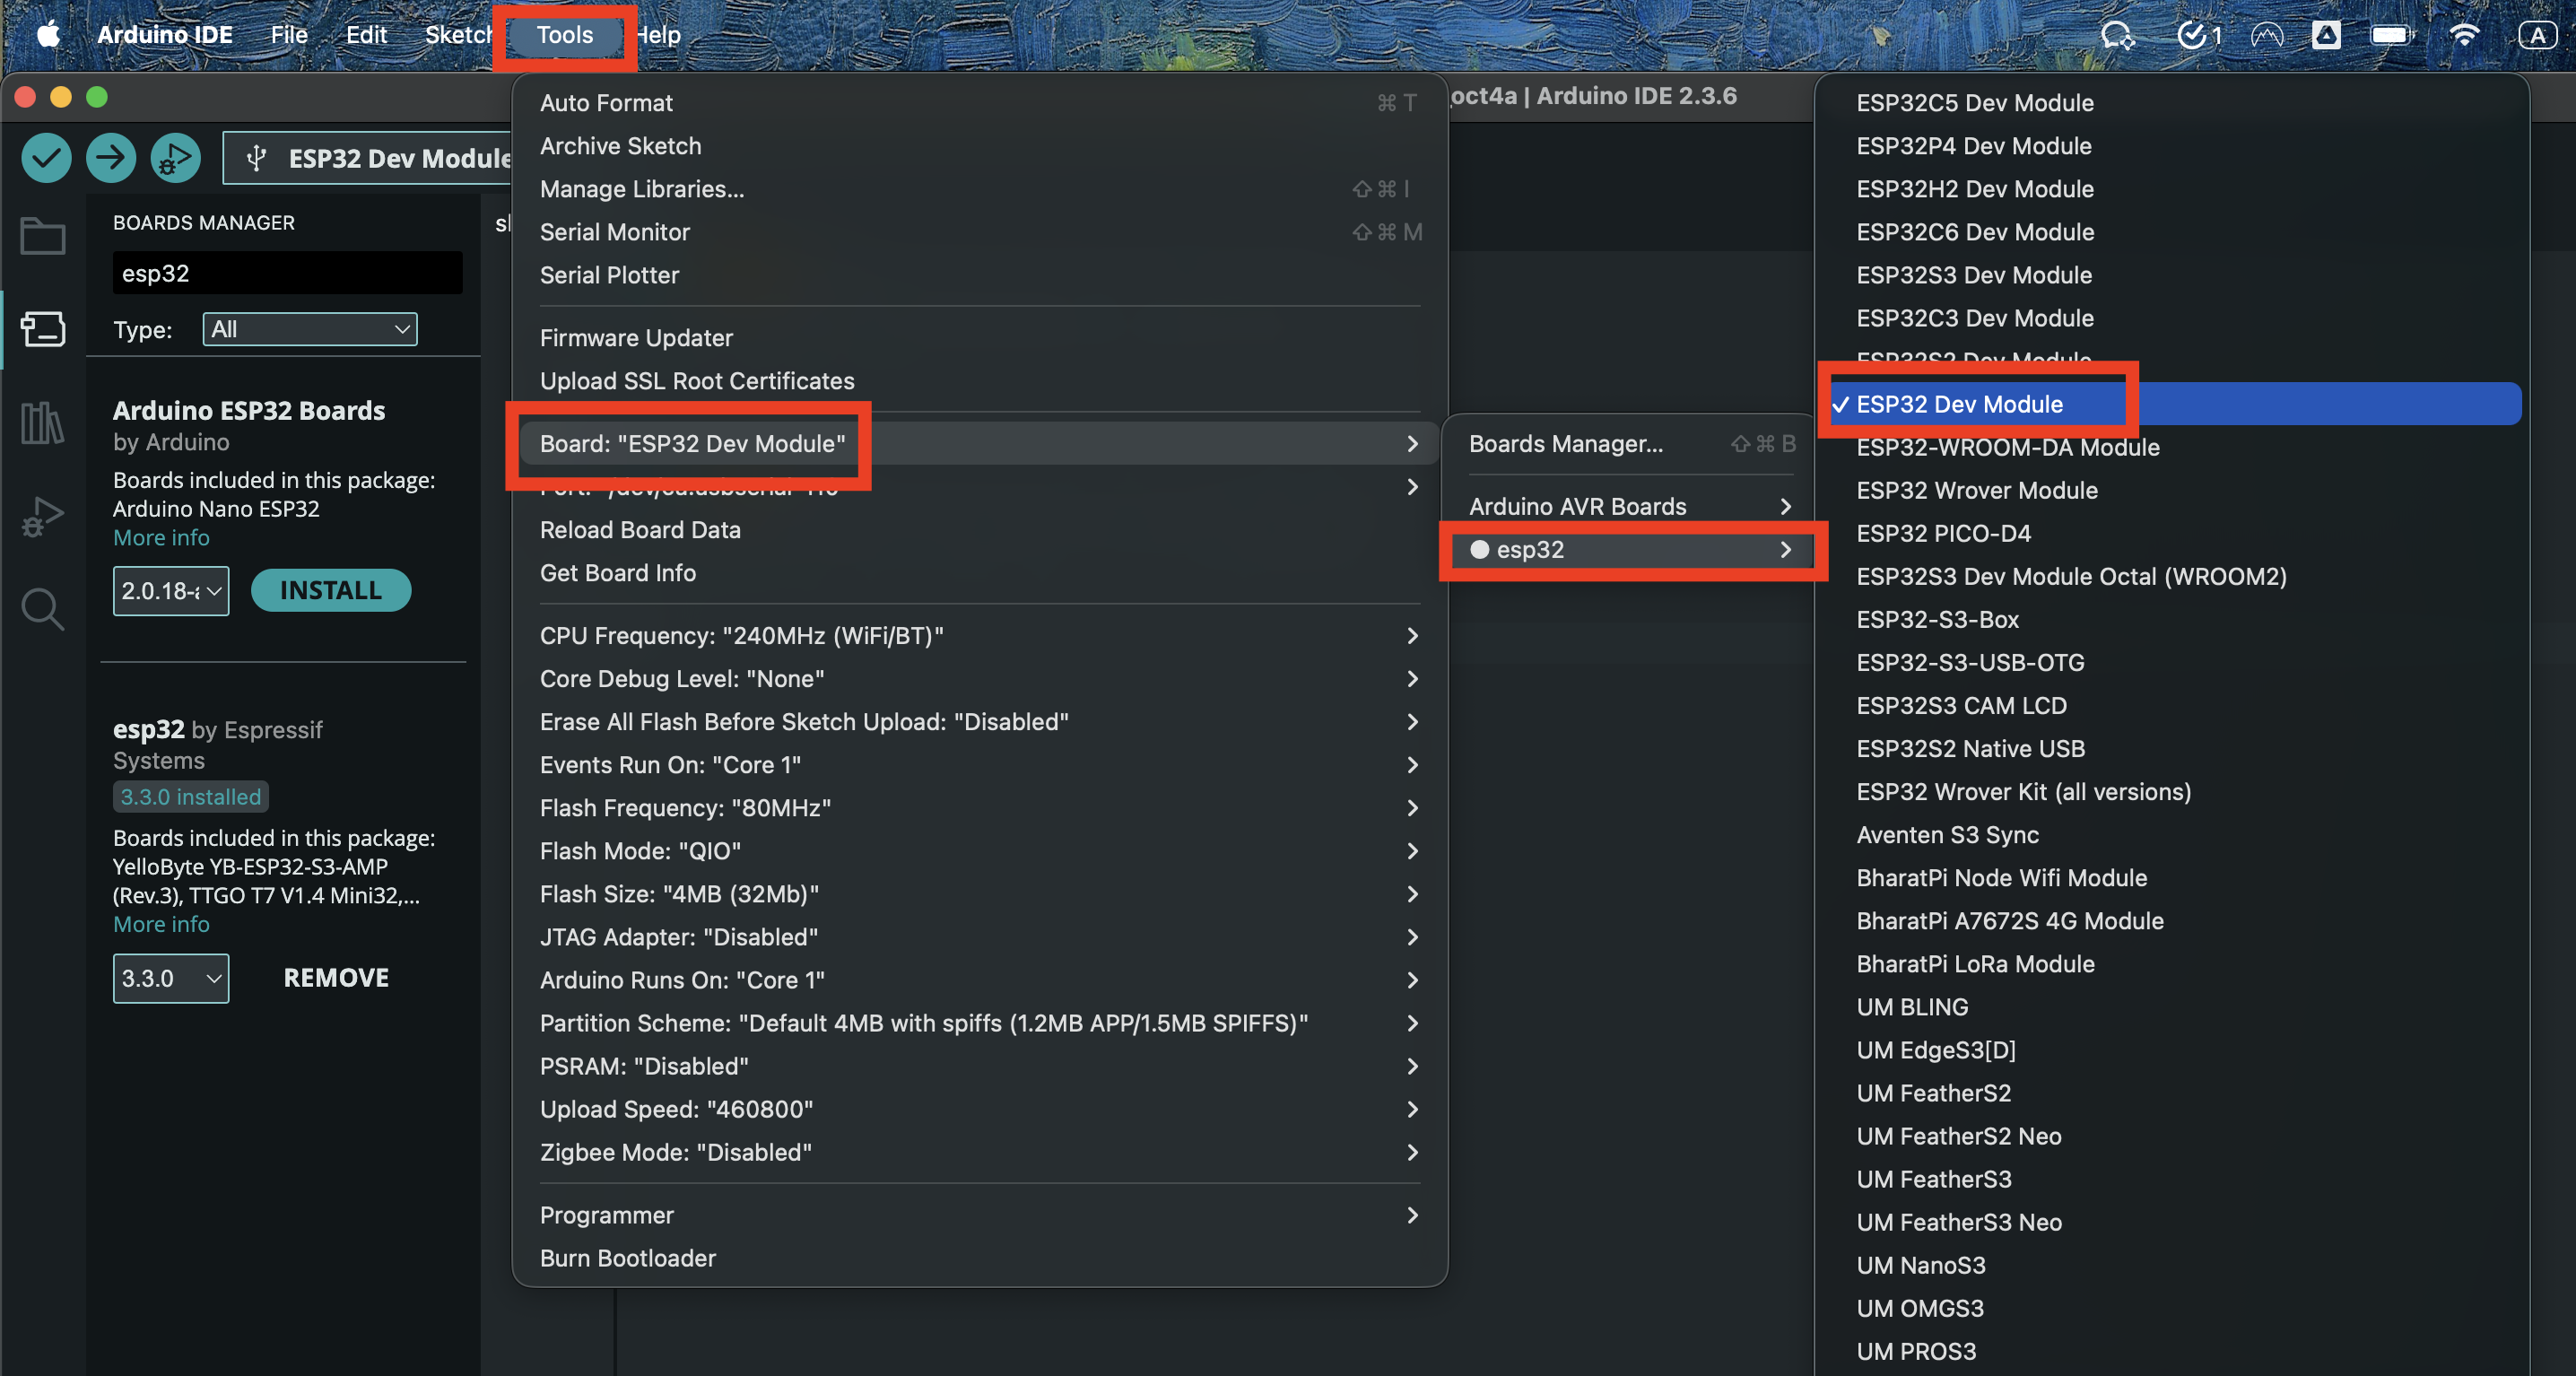
Select the appropriate serial connection under
Tools → Port. On Windows, this is normally aCOMport. It is often the newest or non-consecutive entry; reconnect the board if you need to identify it.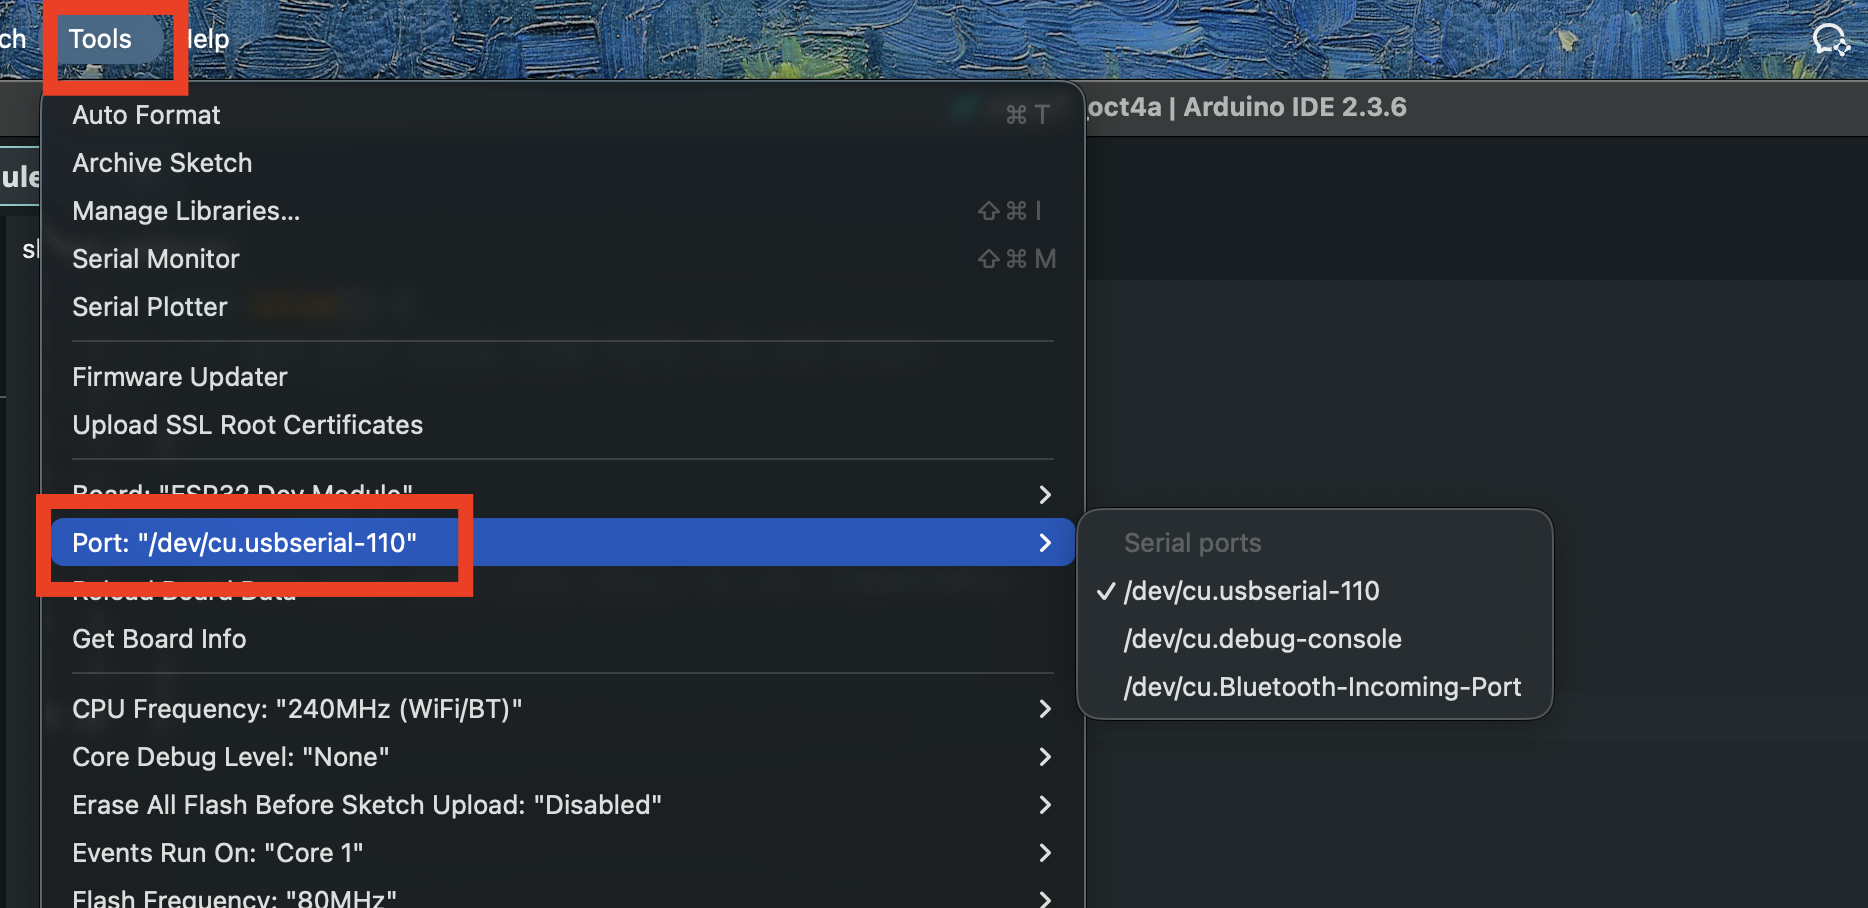
Not every ESP32 requires this setting, but this board does: select
460800underTools → Upload Speed. A lower upload speed can improve reliability, although compilation and uploading already take longer than on a typical Arduino. Use the highest speed that remains stable.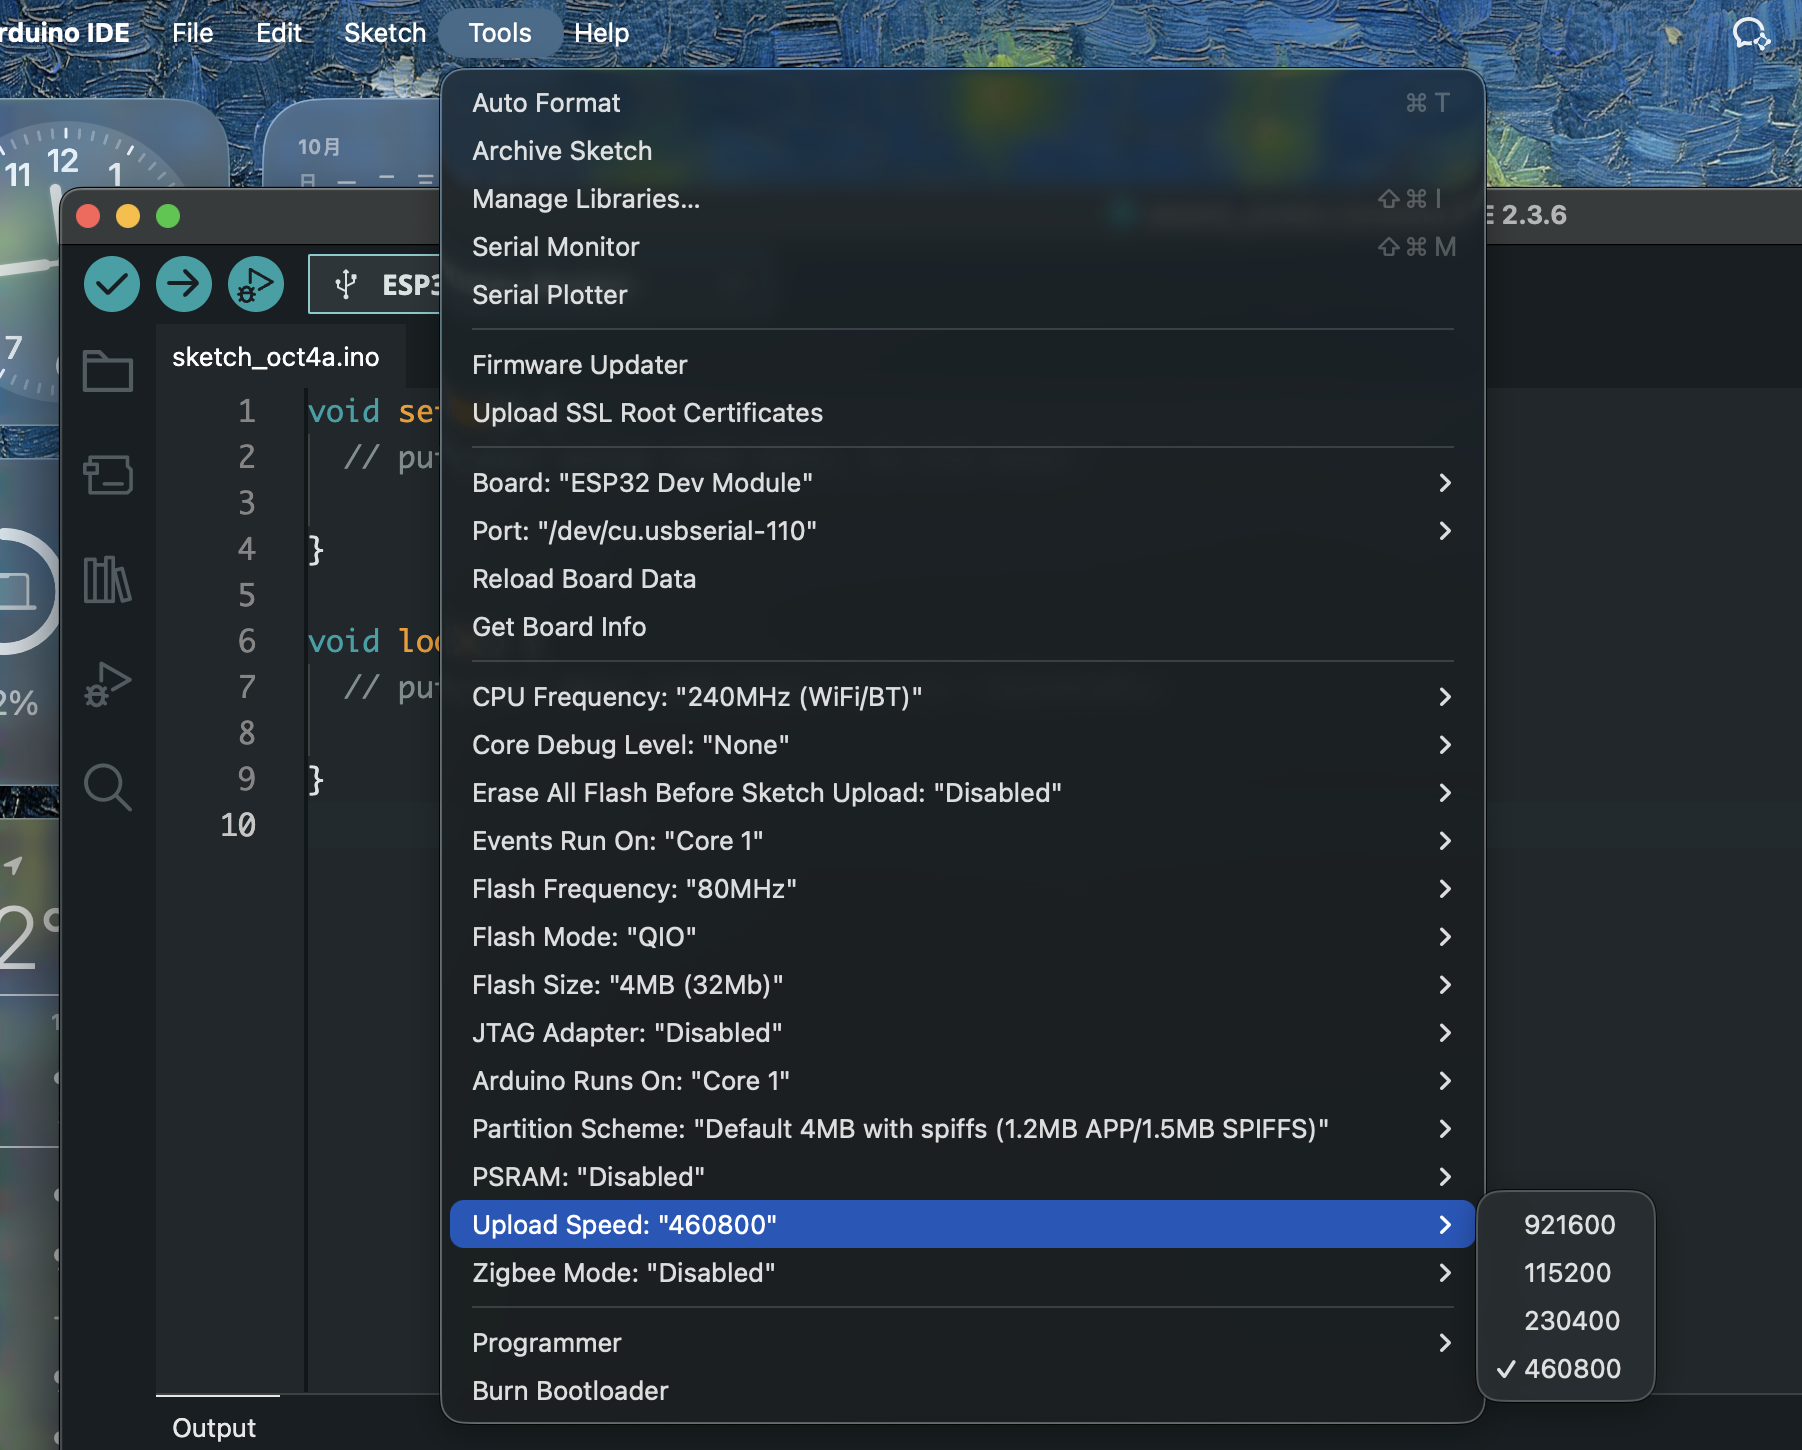
Upload this test program:
void setup() {
  // put your setup code here, to run once:
  Serial.begin(115200);
}

void loop() {
  // put your main code here, to run repeatedly:
  Serial.println("Hello World");
}- Open
Serial Monitorfrom the top-right corner and set its baud rate to115200. Repeated text confirms that the program uploaded successfully. 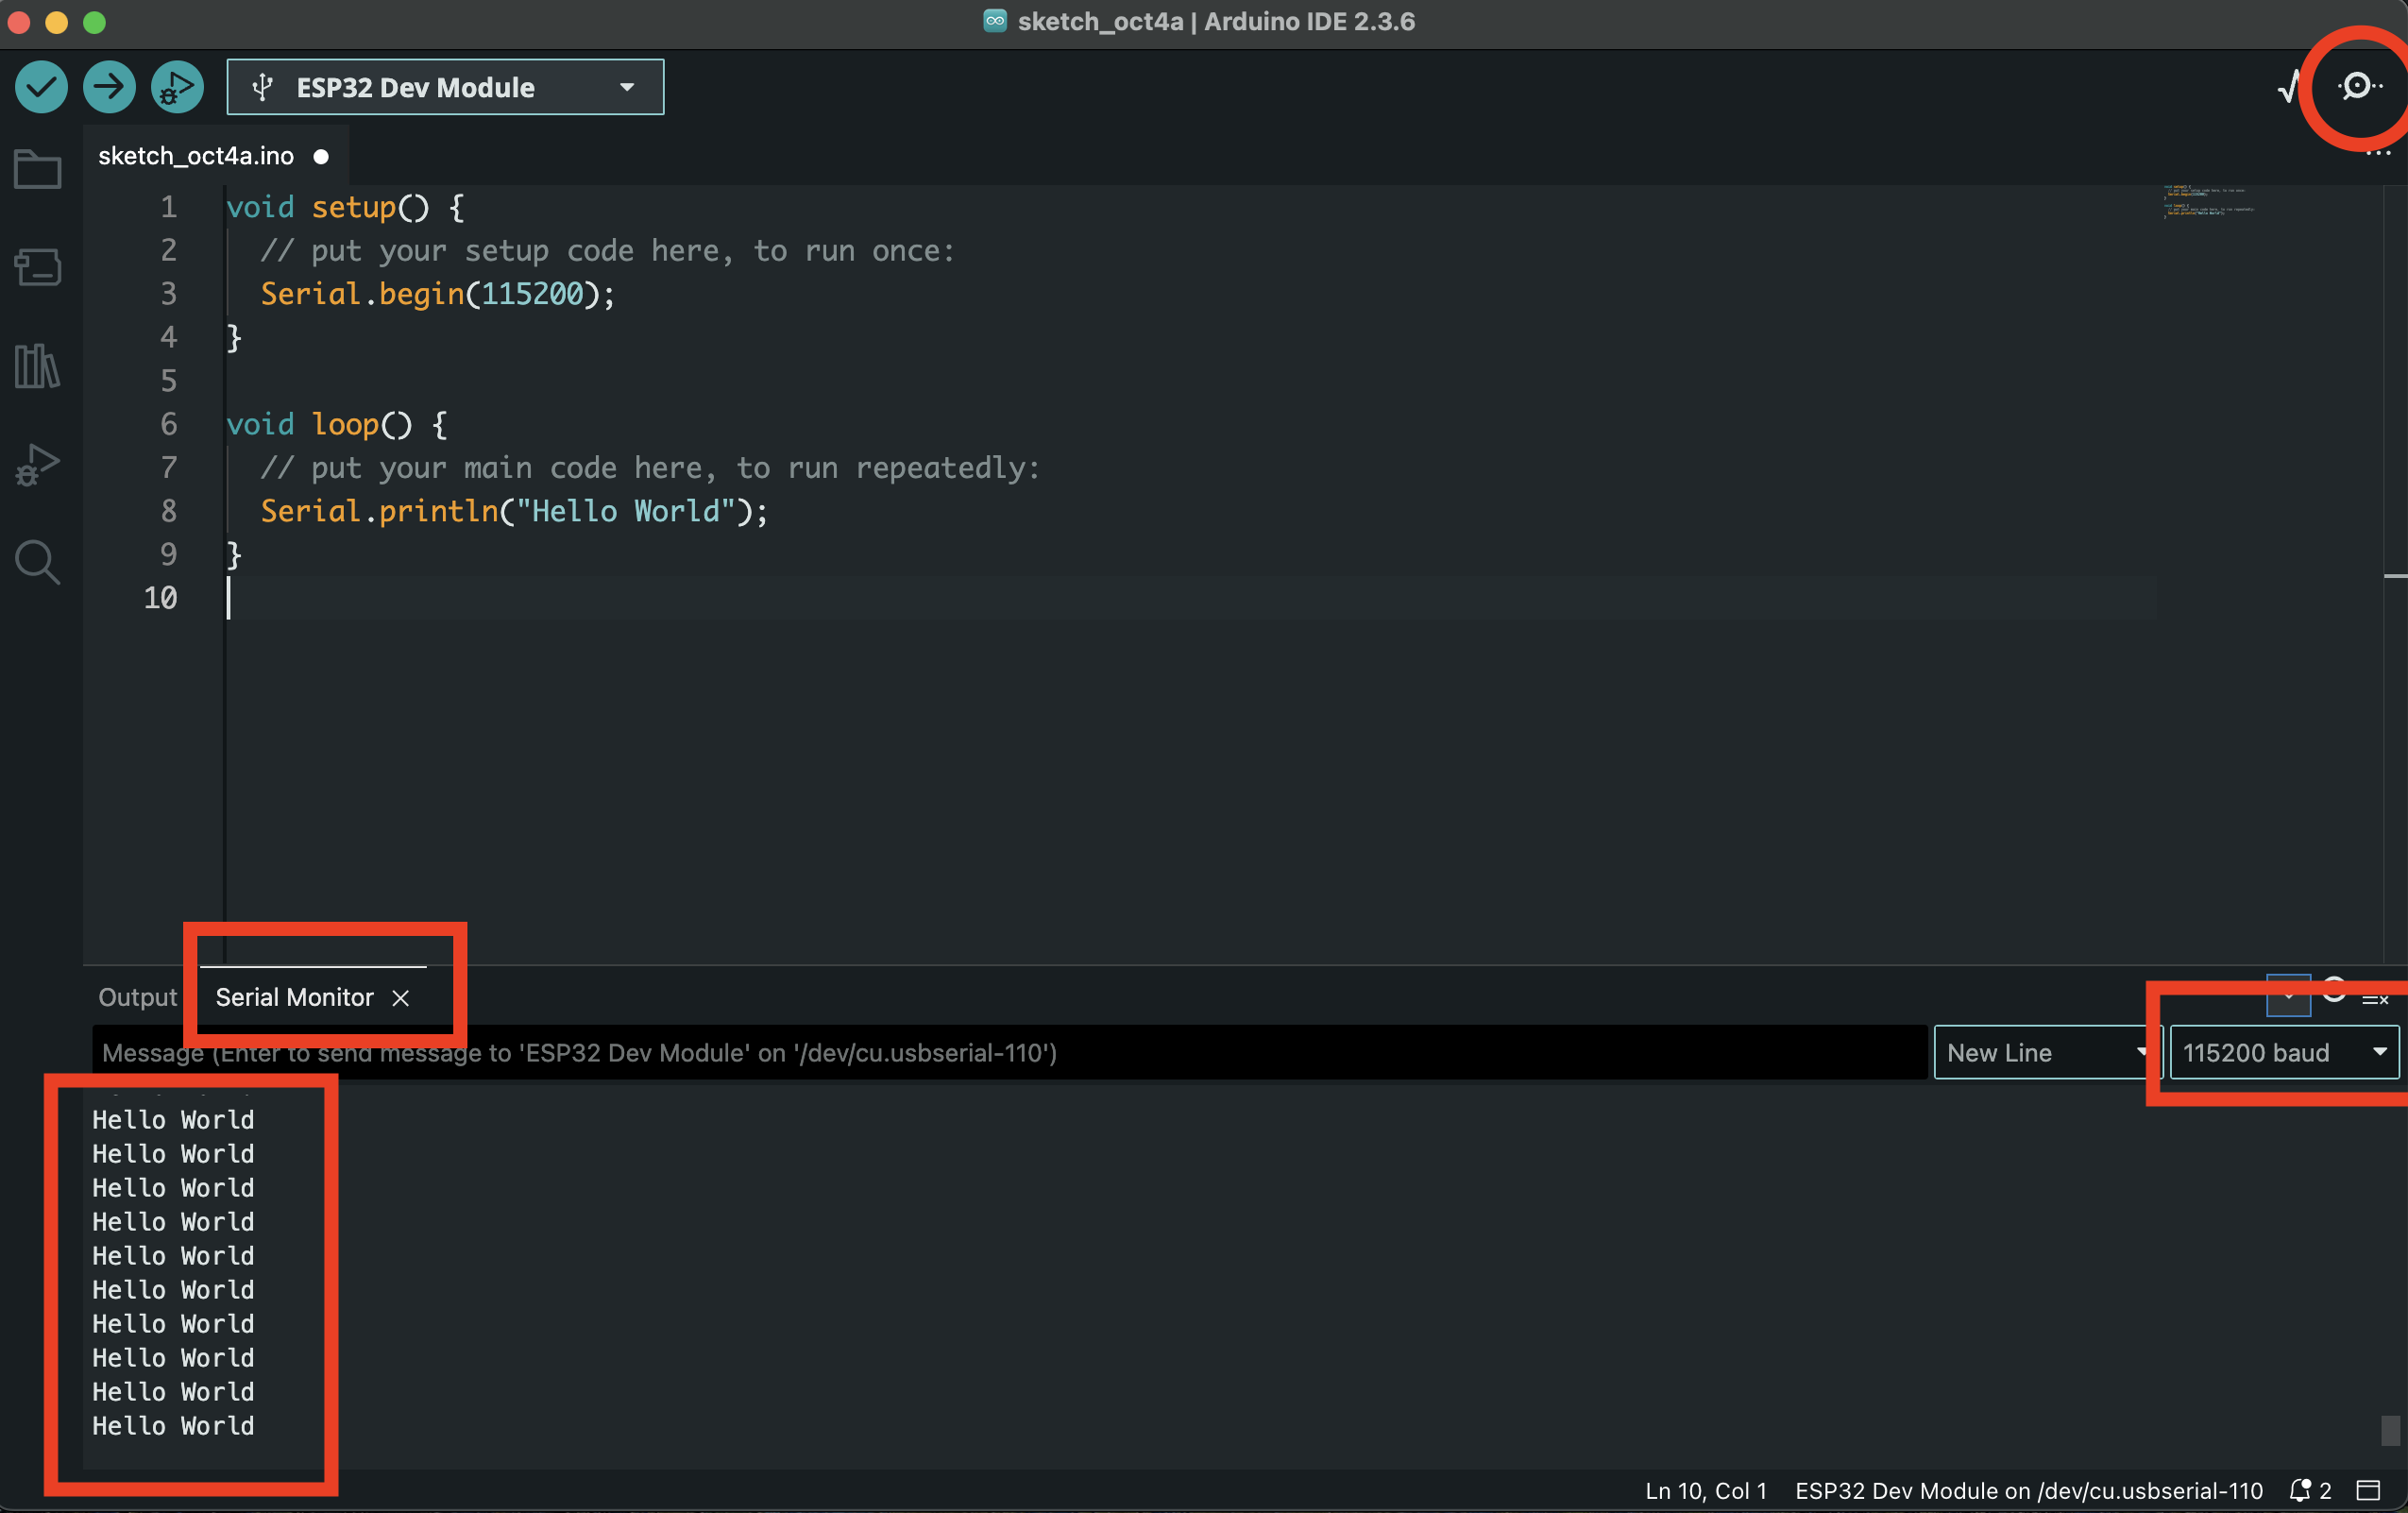
Translation notice: This English page was generated automatically by AI and has not yet been reviewed by a human. It will be checked and revised page by page when time permits.