Adding Libraries and Building a Real-World Board
This chapter explains how to find parts that are not included with EAGLE/Fusion Electronics, import their libraries, and make simple library adjustments.
Where Can I Find Components?
When the built-in libraries do not contain a part, search the web for the part number followed by EAGLE library. For less common parts, try Component Search Engine.
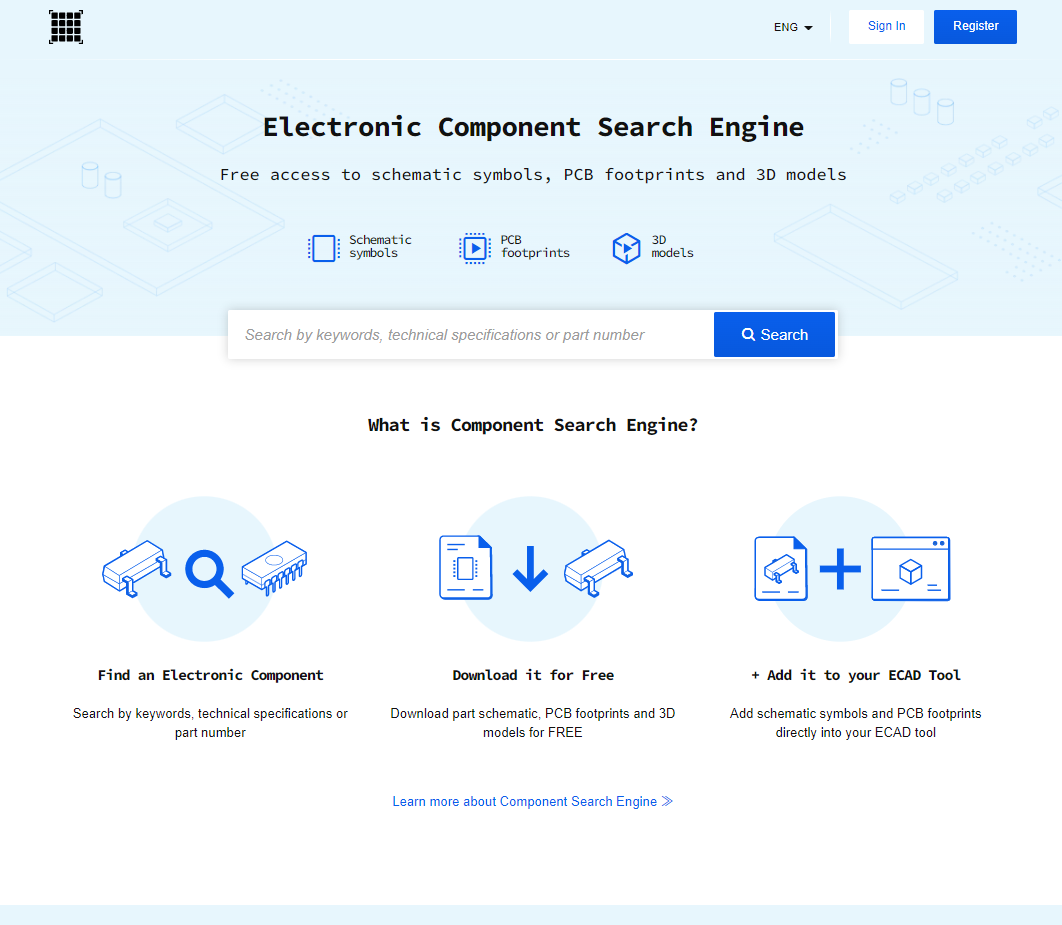
The site contains many components and supports several PCB applications, not only EAGLE. Its generated symbols and footprints can, however, be visually basic.
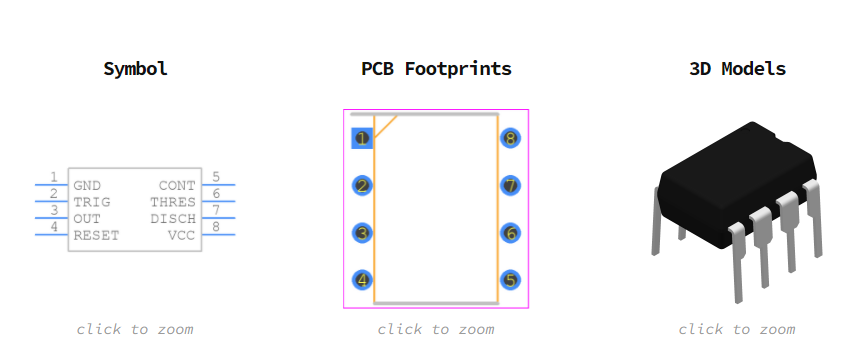
For example, Fusion 360's built-in NE555 symbol arranges pins for readability, whereas a downloaded symbol may simply list them in pin-number order. If no better library is available, download the part and edit it in EAGLE's Library Editor.
Two other useful sources are:
- SparkFun: a well-known electronics supplier with extensive tutorials and open-source component libraries. Search for
SparkFun EAGLE librariesto find its GitHub repository. - diy-modules: a collection covering many inexpensive modules commonly sold online. Its original website is no longer available, but mirrors remain on GitHub.
Importing a Library
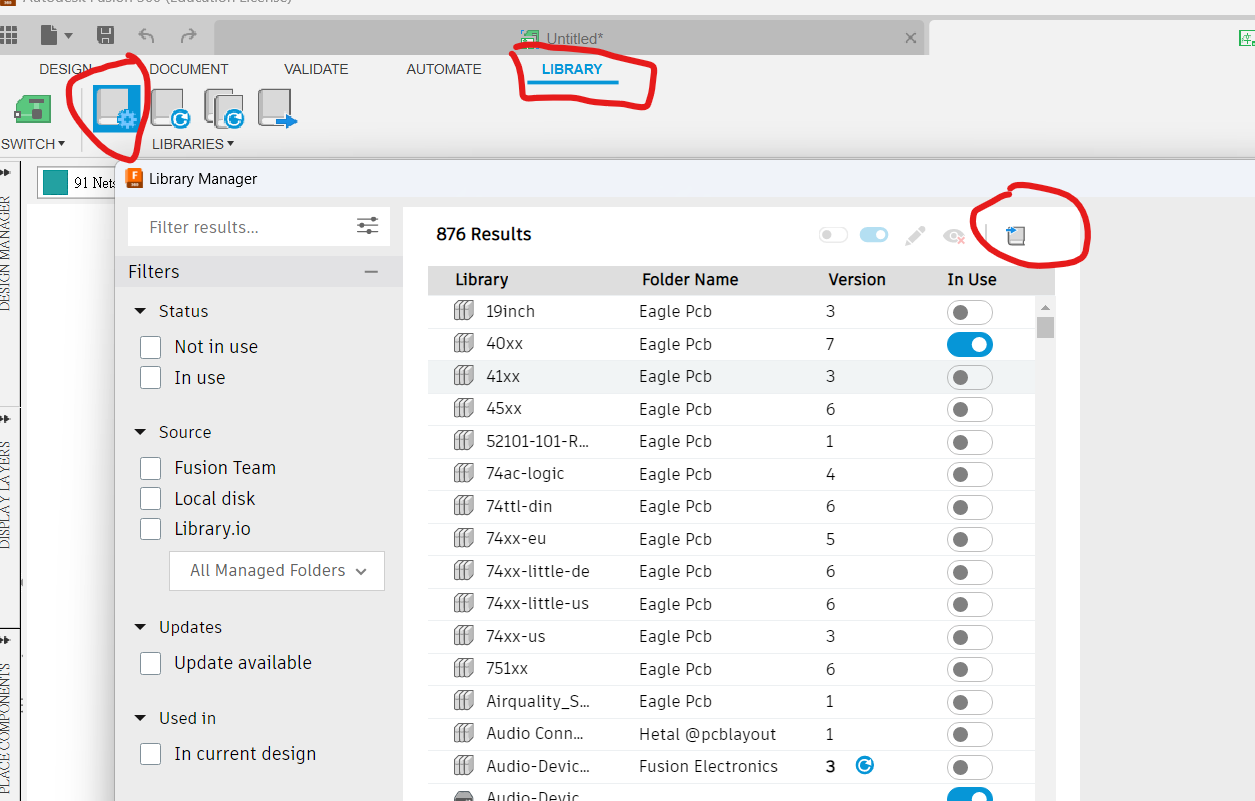
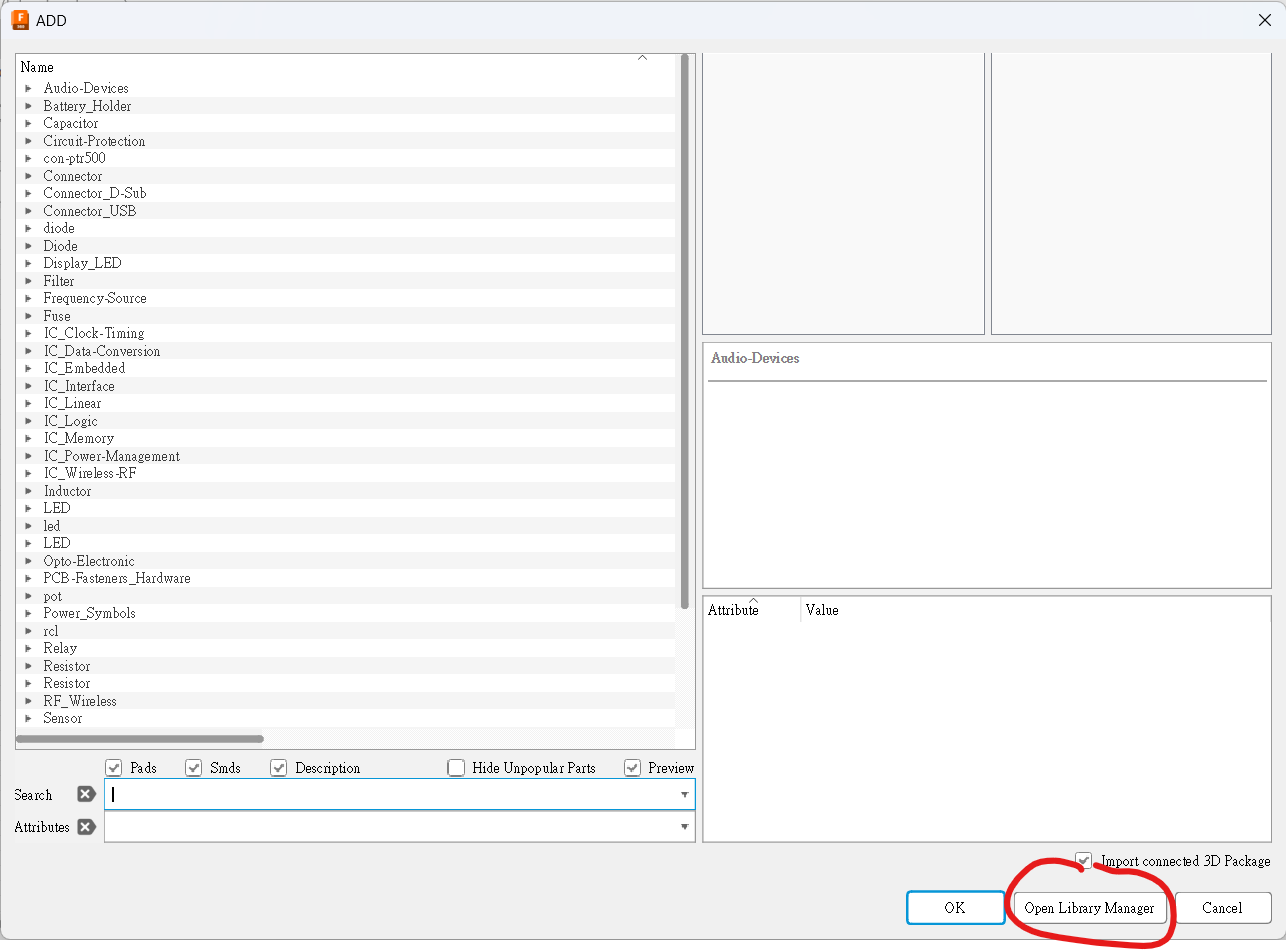
Create a schematic, open LIBRARY in the top toolbar, then select OPEN LIBRARY MANAGER. Alternatively, enter add on the command line and use OPEN LIBRARY MANAGER at the bottom right.
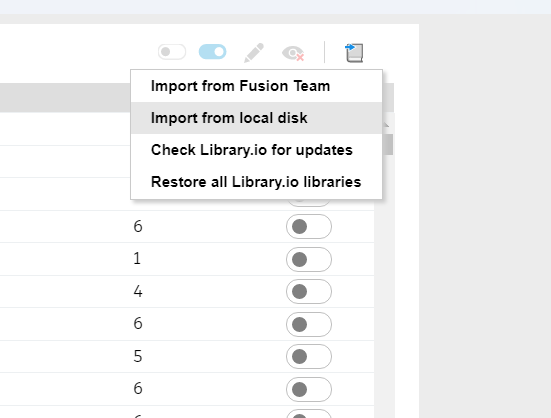
In the upper-right corner of Library Manager, choose IMPORT LIBRARY → Import from local disk. After import, make sure the library is enabled under In Use.
Schematic
The following circuit is a Nano version of an Arduino Uno shield used in Form 4. It combines push-buttons, RGB LEDs and potentiometers for Arduino lessons, along with an nRF24L01 module for two-way wireless control.
💡TIP
Grey net labels act like portals: nets with the same label are electrically connected without long wires cluttering the schematic.
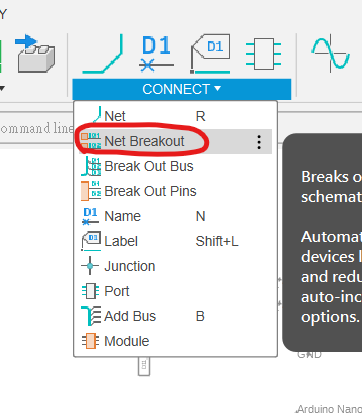
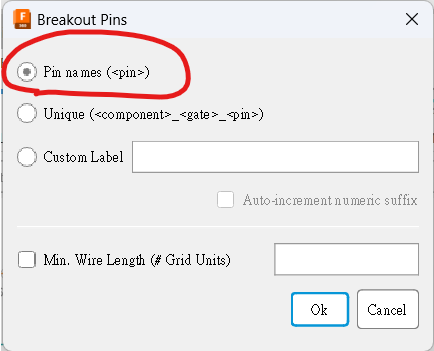
For Arduino devices, use Net Breakout → Pin names to create nets and labels automatically. For other components, use Net to draw a connection, then Name and Label to name it.
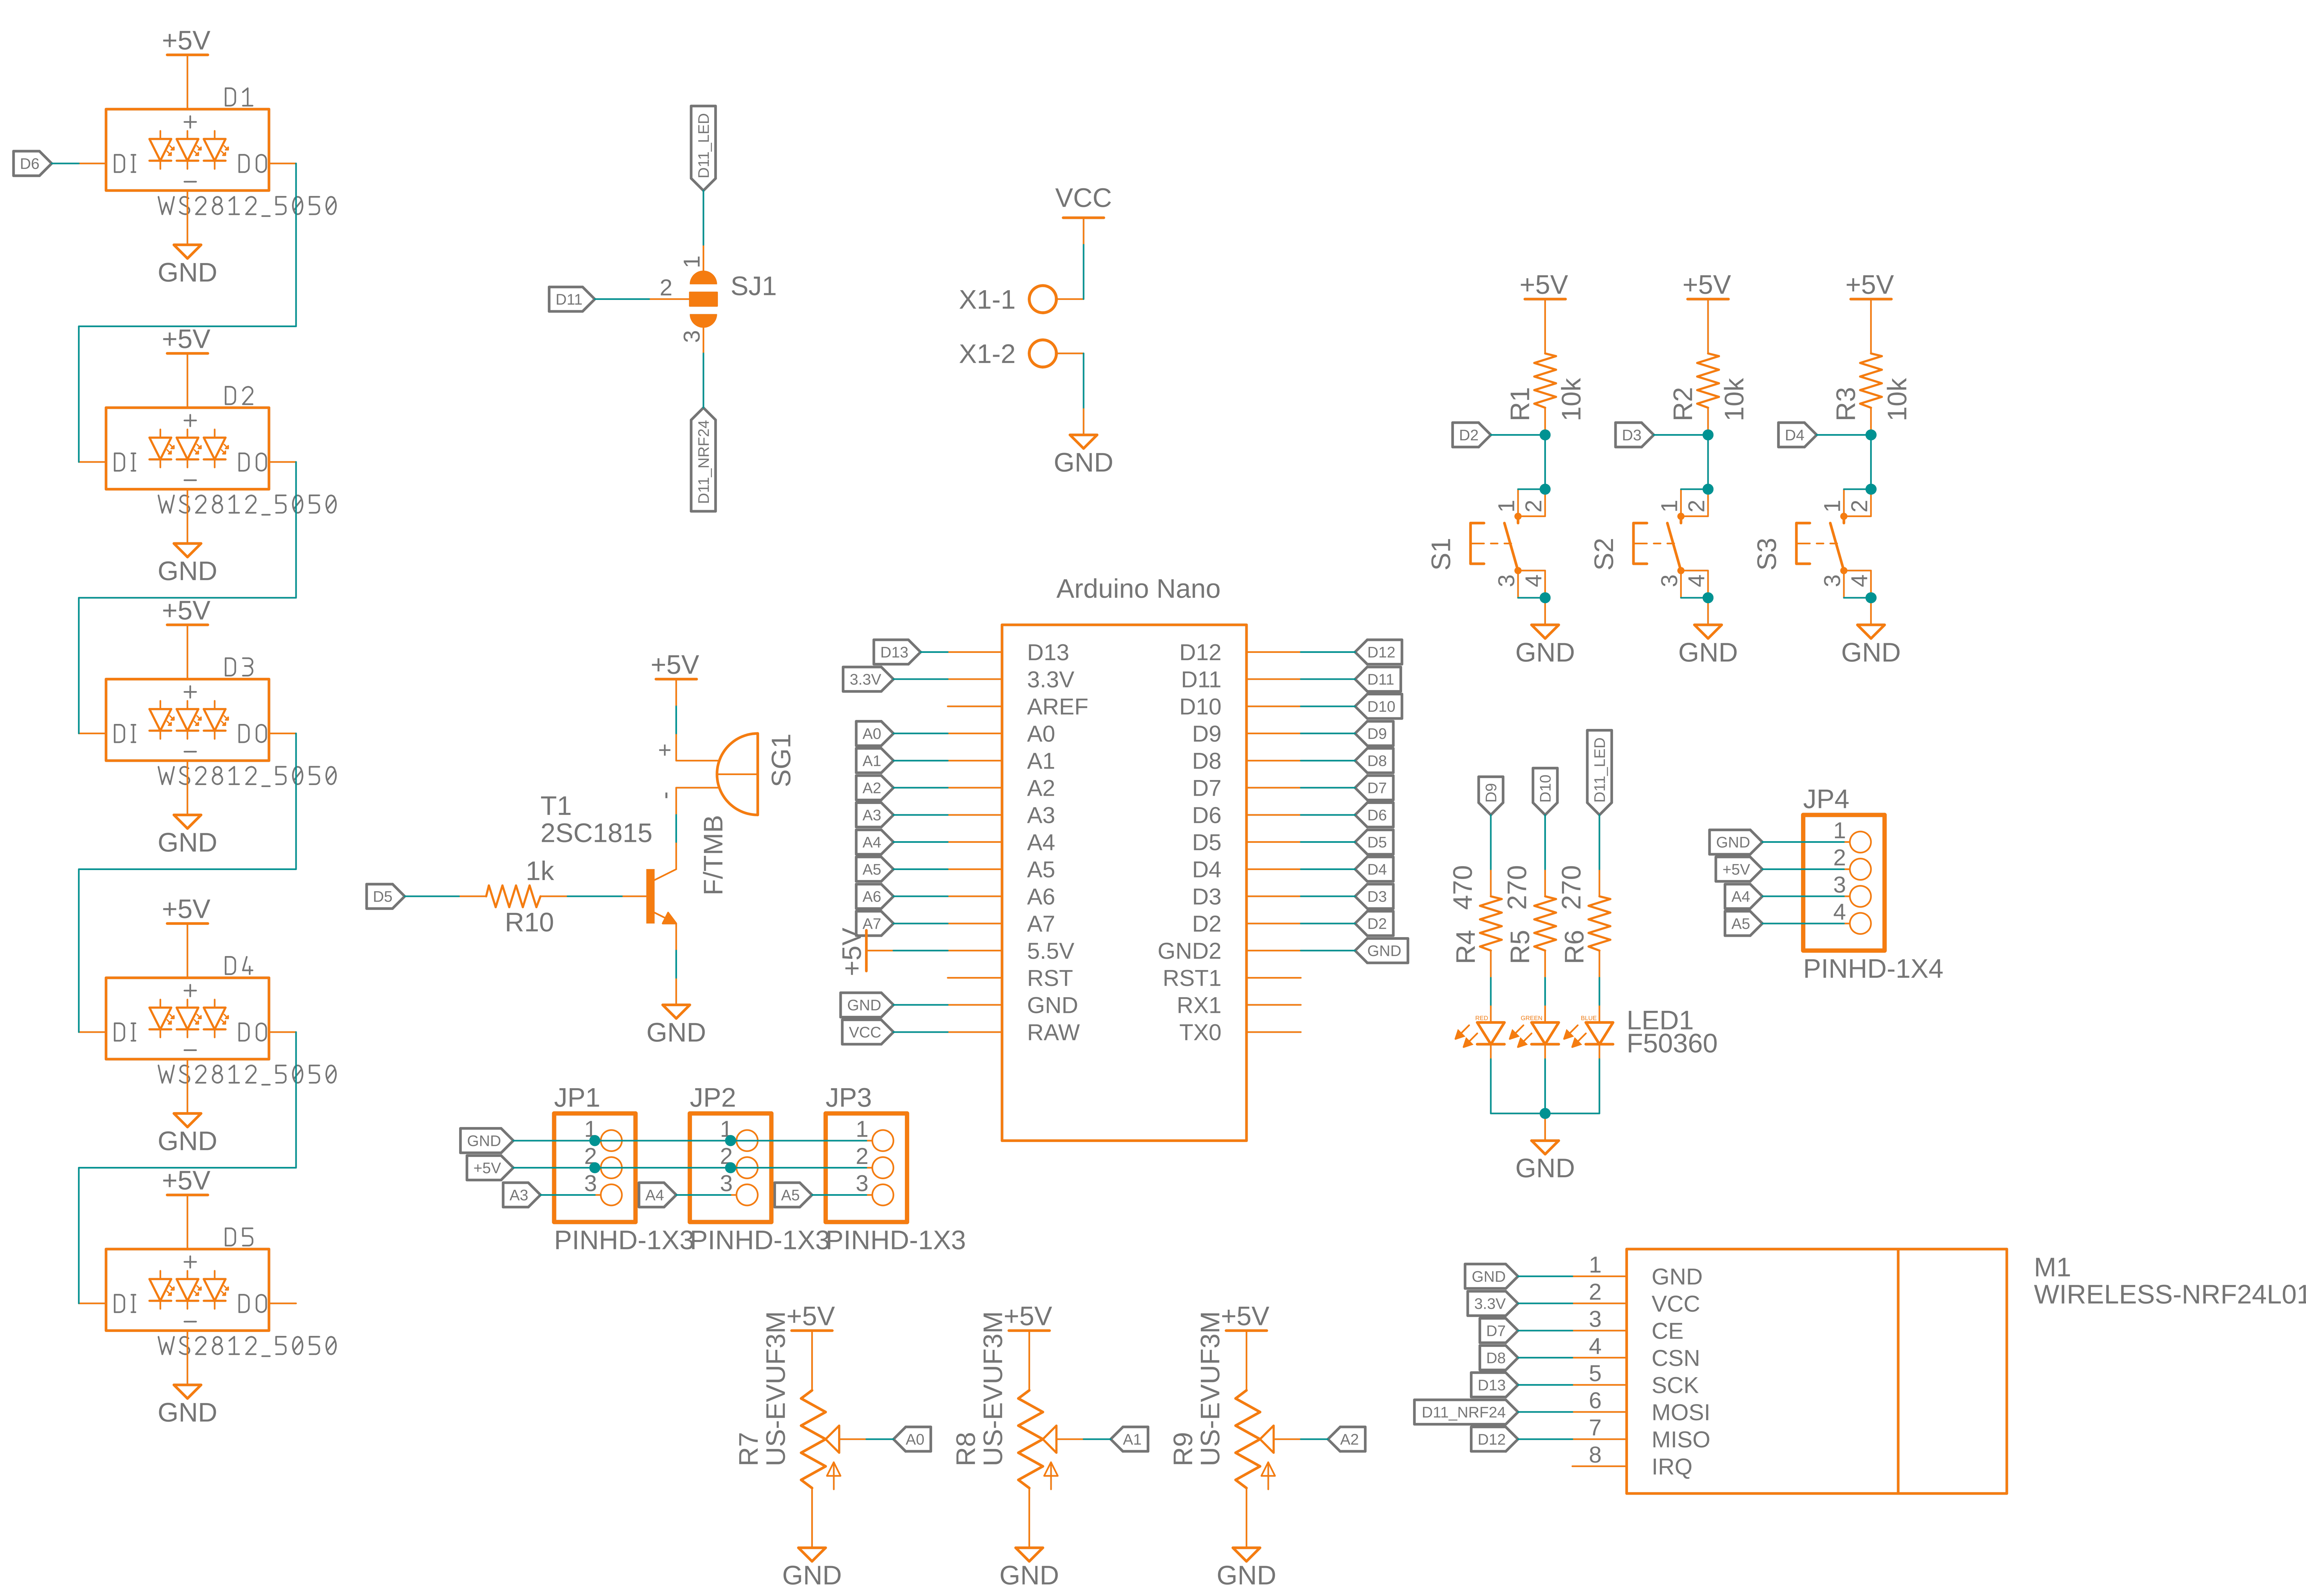
The component list is shown below. The nRF24L01 uses diy-modules.lbr; the Arduino Nano uses Arduino-clone.lbr. The remaining parts are available from Fusion 360's built-in libraries.
⚠️WARNING
There is only one VCC net, connected to the Arduino RAW input. The other supply nets are Arduino +5V; the nRF24L01 must use the Arduino's 3.3V supply.
| Part | Value | Device | Package | Library |
|---|---|---|---|---|
| D1–D5 | WS2812_5050 | WS2812_5050 | WS2812-5X5-4PIN | SparkFun-LED |
| JP1–JP3 | PINHD-1X3 | PINHD-1X3 | 1X03 | Connector |
| JP4 | PINHD-1X4 | PINHD-1X4 | 1X04 | Connector |
| LED1 | F50360 | F50360 | F50360 | Connector |
| M1 | WIRELESS-NRF24L01 | WIRELESS-NRF24L01 | WIRELESS-NRF24L01 | diy-modules |
| R1–R3 | 10k | R-US_R0805W | R0805W | rcl (Version 11) |
| R4 | 470 | R-US_R0805W | R0805W | rcl (Version 11) |
| R5–R6 | 270 | R-US_R0805W | R0805W | rcl (Version 11) |
| R7–R9 | US-EVUF3M | US-EVUF3M | EVUFXM | pot (Version 2) |
| R10 | 1k | R-US_R0805W | R0805W | rcl (Version 11) |
| S1–S3 | 40-XX | B3F-40XX | switch-omron (Version 3) | |
| SG1 | F/TMB | F/TMB | F/TMB | buzzer (Version 2) |
| SJ1 | SJ2W | SJ_2 | jumper (Version 2) | |
| T1 | 2SC1815 | 2SC1815 | TO92-ECB | transistor (Version 7) |
| U$1 | NANO | NANO | NANO | Arduino-clone |
| X1 | AK500/2 | AK500/2 | con-ptr500 (Version 3) |
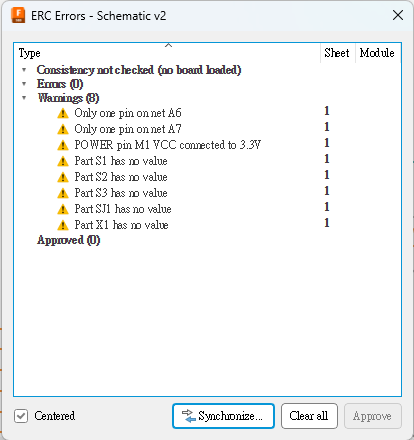
Run ERC when the schematic is complete. The warnings shown below are expected for this design and can be reviewed and approved.
Board Layout
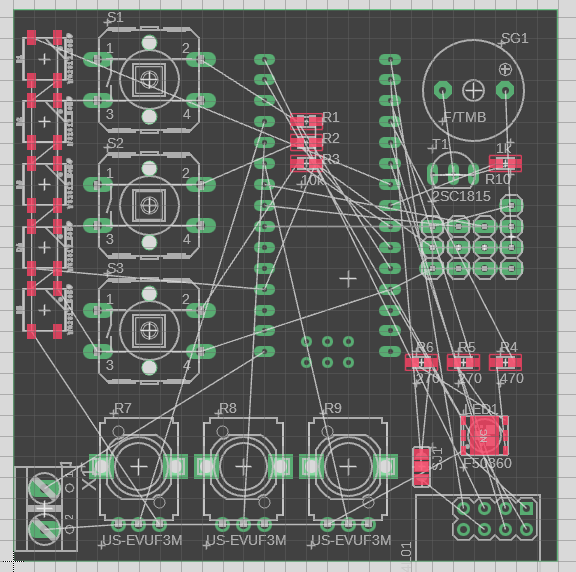
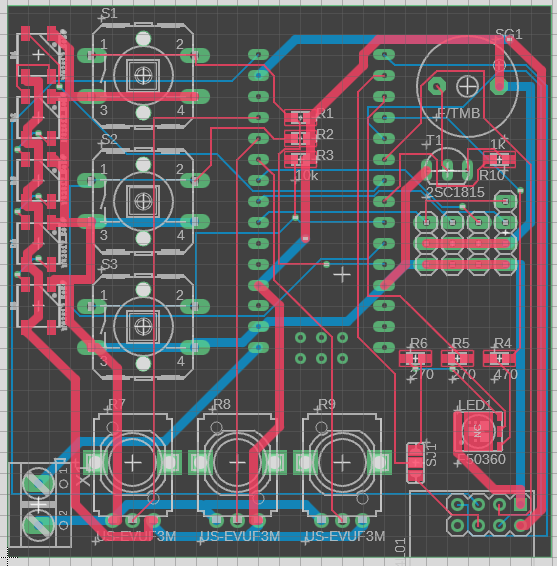
Arrange the parts in as little space as practical. Components that are electrically related—for example, the RGB LED resistors and transistor resistors—should also be physically close together.
- Use
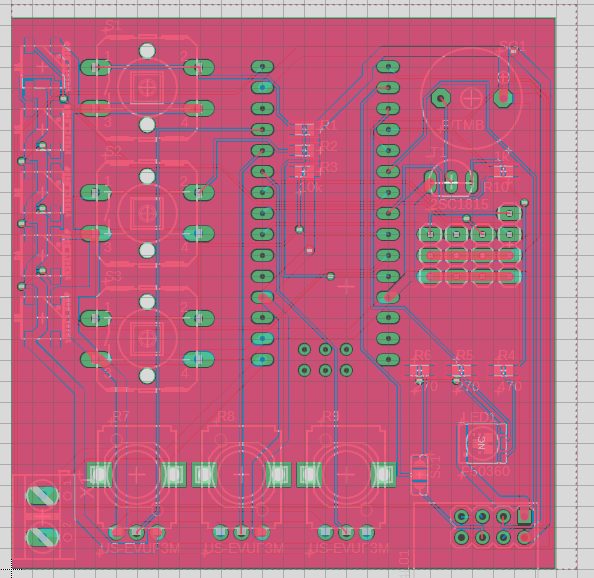
DRCto set the boundary and mask clearance to3 mm. - Add the copper polygon to complete the layout.
Translation notice: This English page was generated automatically by AI and has not yet been reviewed by a human. It will be checked and revised page by page when time permits.